Tutorial: Freestyle Ring tool
Welcome on Freestyle Ring! Freestyle Ring is a free creation tool which enables to create your own personalized ring, just as you imagine it. Based on the 3D modeling principle presented here, you will work as a real designer. It is the most complex tool to use, but also the one that allows the greatest creative freedom. Ready to face the challenge? Let’s go!
Tool overview
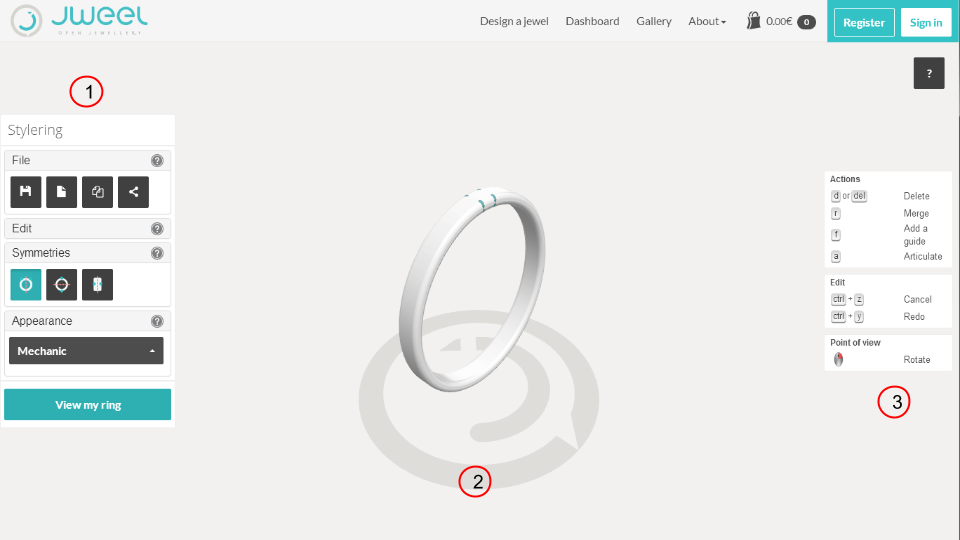
Action Menu
The action menu enables you to change the scene, the behavior of elements or edits. It also enables you to manage your file. Let's have a look on the different menus.
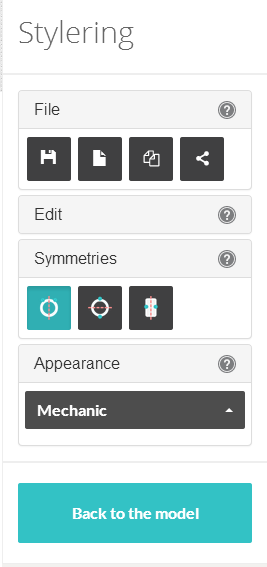
File Menu
The file menu enables you to save your work or to publish it in the gallery.
 |
Save" | Save your current work |
 |
New object | restart your object |
 |
Save as | save under a new file name |
 |
Publish | Publish your object in the gallery |
Edit menu
The Edit menu enables you to cancel or redo your last action, or to add elements on the scene.
 |
Cancel | Cancel your last action |
 |
Redo | Redo your last action |
 |
Add a ring | Add an additional ring |
Symmetries menu
Symmetries enables you to create structured objects. When activated, every elements that has been created will have (at least) one symmetry. These elements will keep their symmetry even when it is disabled. When an element which has one or several symmetries is moved, its symmetries are also moved.
 |
Activates the X symmetry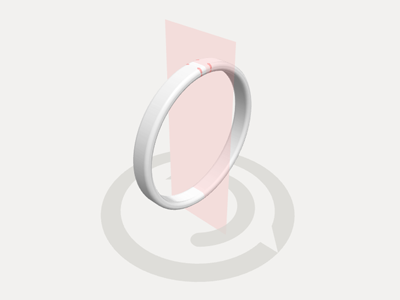
|
 |
Activates the Y symmetry
|
 |
Activates the Z symmetry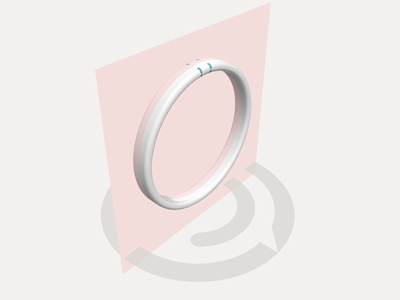

|
Appearance Menu
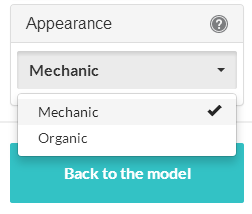
This menu enables you to change the final appearance of your ring. Depending on your choice, the final rendering will be \"mechanic\" or \"organic\". Do not hesitate to try both modes, the appearance of your object will be very different.
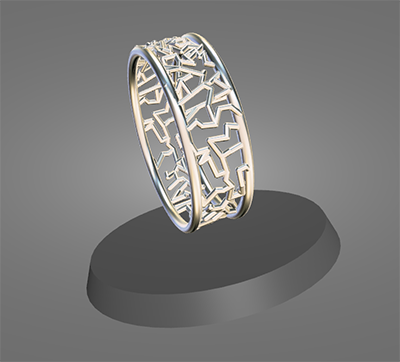
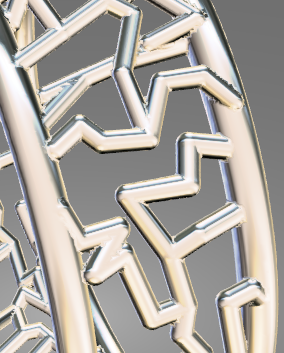
Sharp appearance
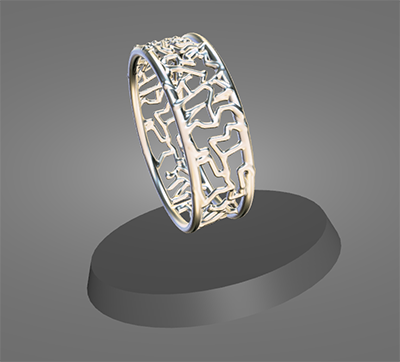
Smooth appearance
View my ring

This button enables you to move from the model of your object to its final appearance, in the material of your choice.
En cliquant sur "Visualiser ma bague", vous faîtes apparaitre le menu de commande sur la droite de l'écran.

It enables you to:
- Select a material (silver, gold, titane, etc..)
- Select a finish corresponding to the chosen material
- Know the price of your object in real time (NB: For more information on pricing, cf. FAQ \"How is the price determined ?\")
- Get immediate information on shipping costs
- To know the dimensions of your object
- Add to cart
Back to the model

This button enables you to go back to your model and keep on working on it.
Pedestal
The pedestal has a dual function:
- To give you a landmark when you are working on your model
- To give you the time needed to generate a 3D view of your model
Helper

The Help guides you in your different creative actions. Key and mouse commands are indicated, as well as keyboards shortcuts.Controls are classified: actions on the object, view edit, edit shortcuts...Some keys enable to enter special edit modes (delete, articulate, merge aso.). These keys have to be held down as long as you want to use the edit mode.
Scene elements
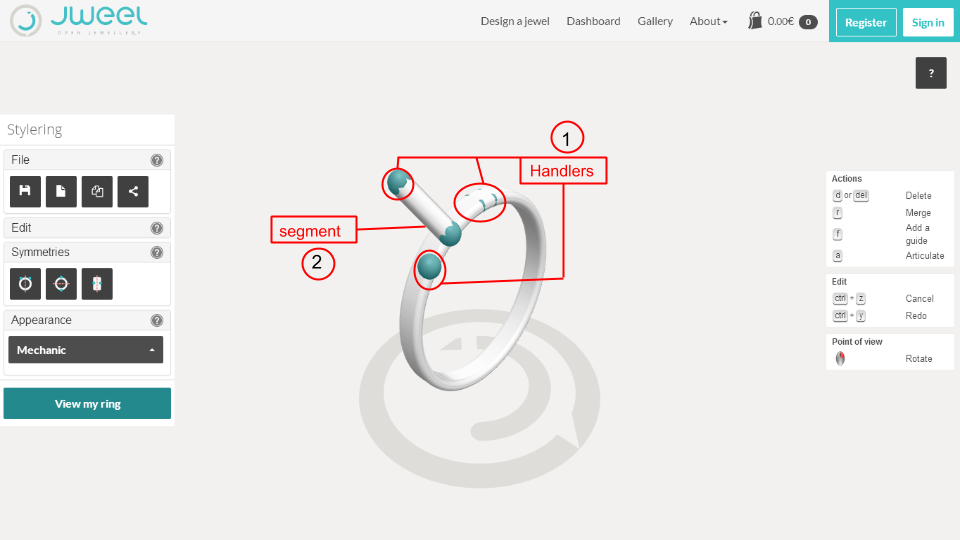
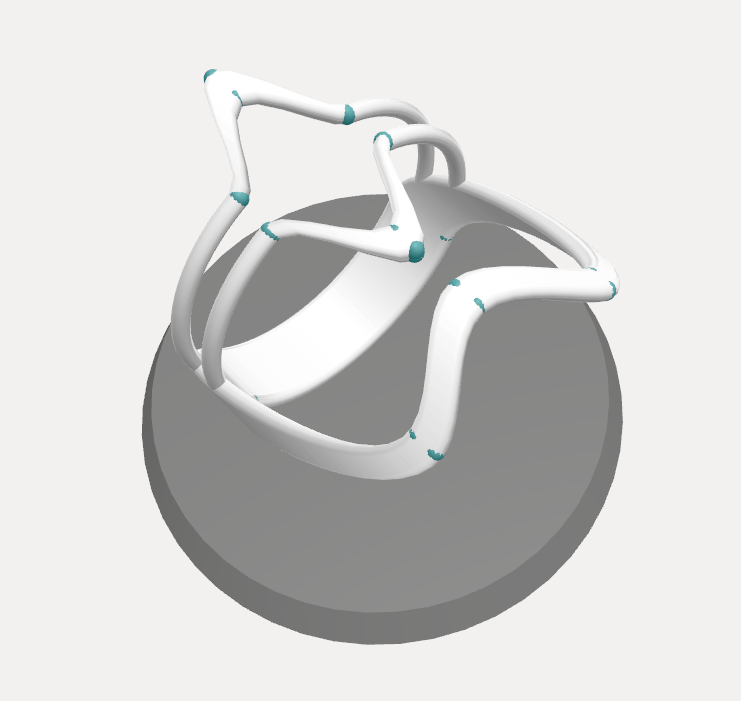
Handlers
Handlers enables you to work on the shape of your ring and segments. A handler left alone will look like a ball on your object.
Segments
Segments are defined by two handlers

Rings
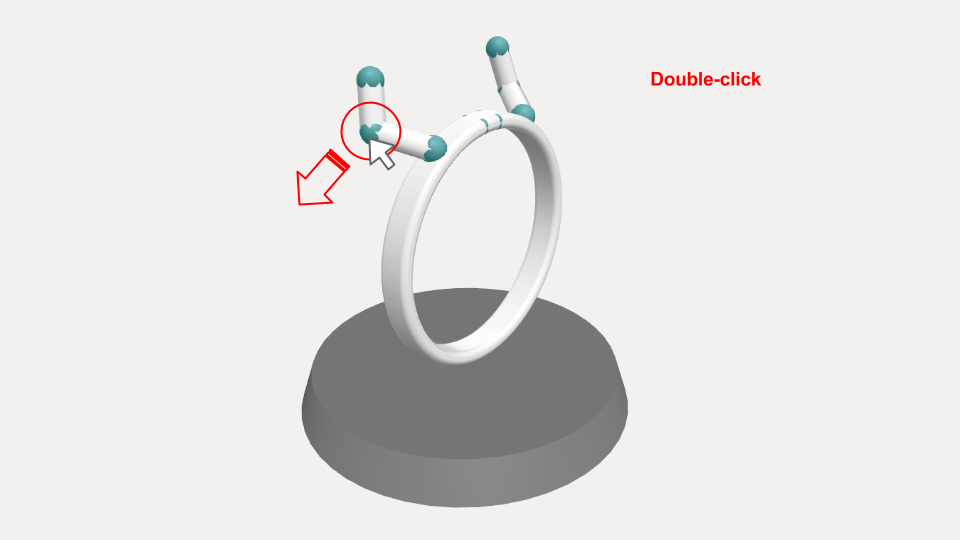
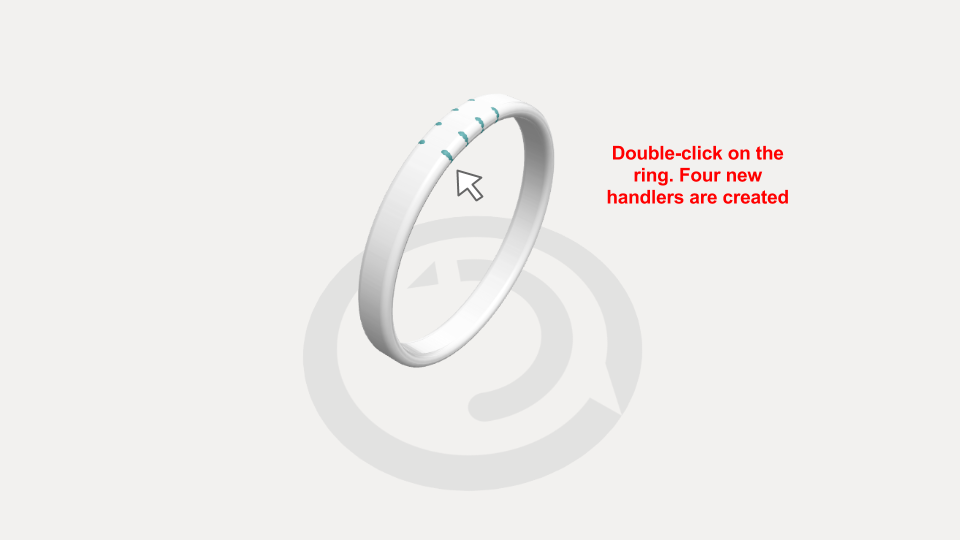
The ring is defined by several handlers that allows you to change the shape of the ring.You can add handlers where you want by double-clicking on the ring.

Actions
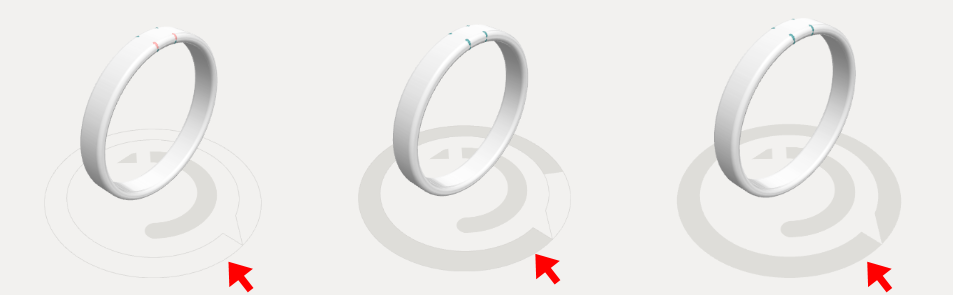
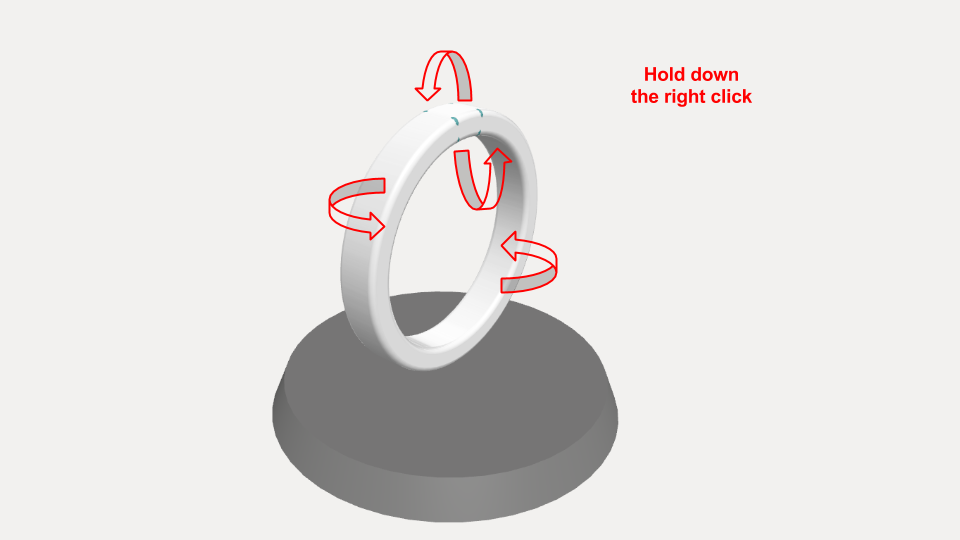
Camera actions
Jweel offers you a 3D view of your ring. Get use to regularly change your point of view while working on your model.
Held down the right clic of your mouse and move the camera around the ring to change the point of view
Add a ring
Double-click on the ring to add a set of handlers.
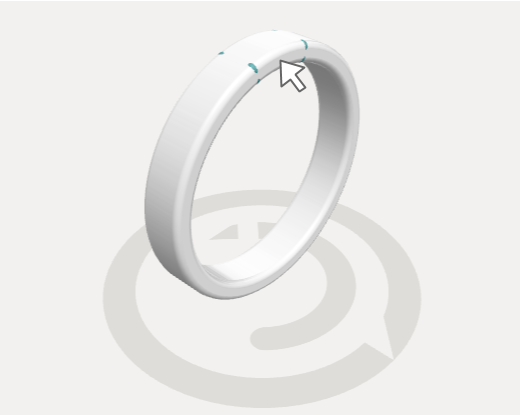
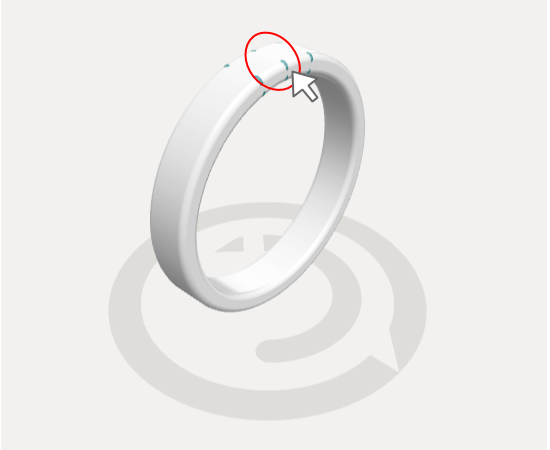
To add handlers enables you to work on isolated sections of the ring and to distort it. Indeed, this action subdivides the ring.

Examples:
Hold the click down on a handler and make your ring respond.
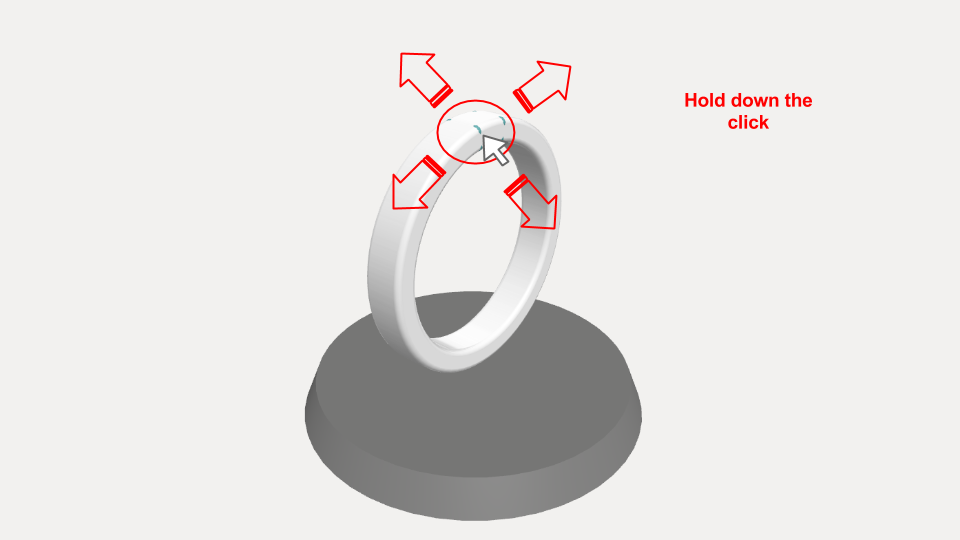
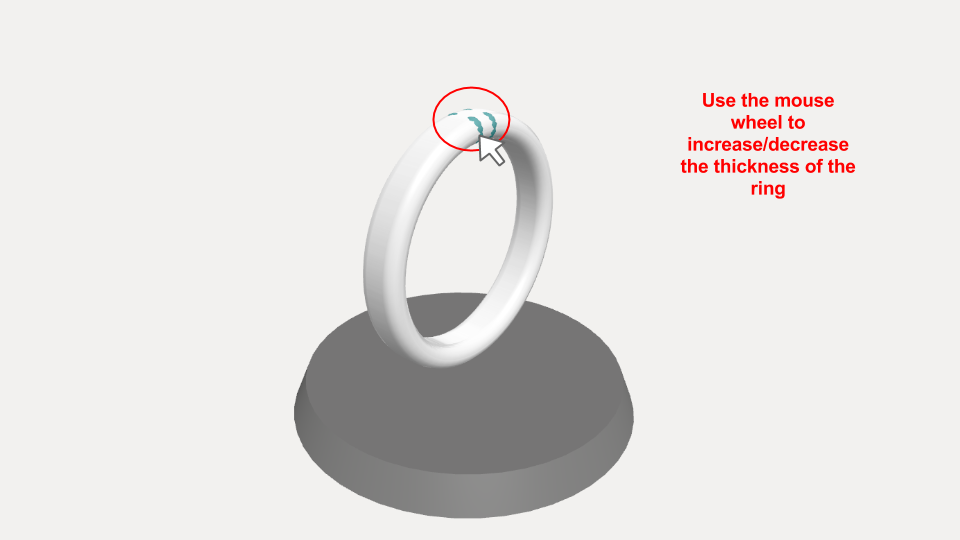
Use also the mouse wheel to make your ring respond.
NB: Symmetries also involve handlers, think about checking/unchecking boxes according to your wishes.
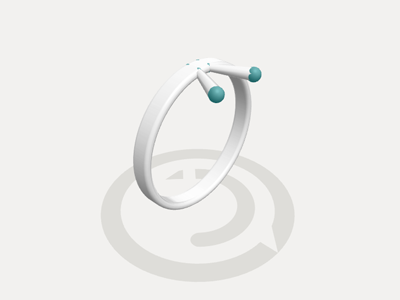
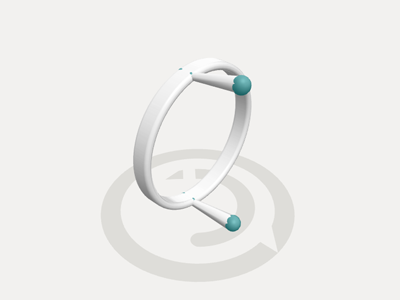
Actions on segments
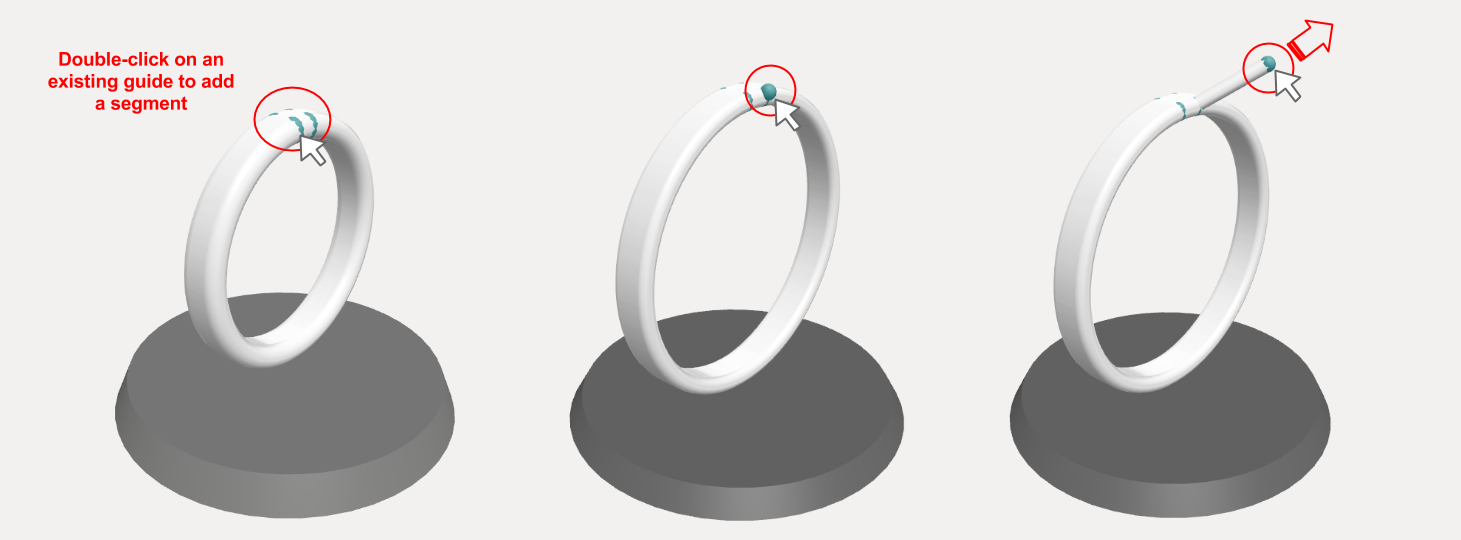
Add a segment by double-clicking on a ring's handler. Then you can move the segment by clicking on the new handler.
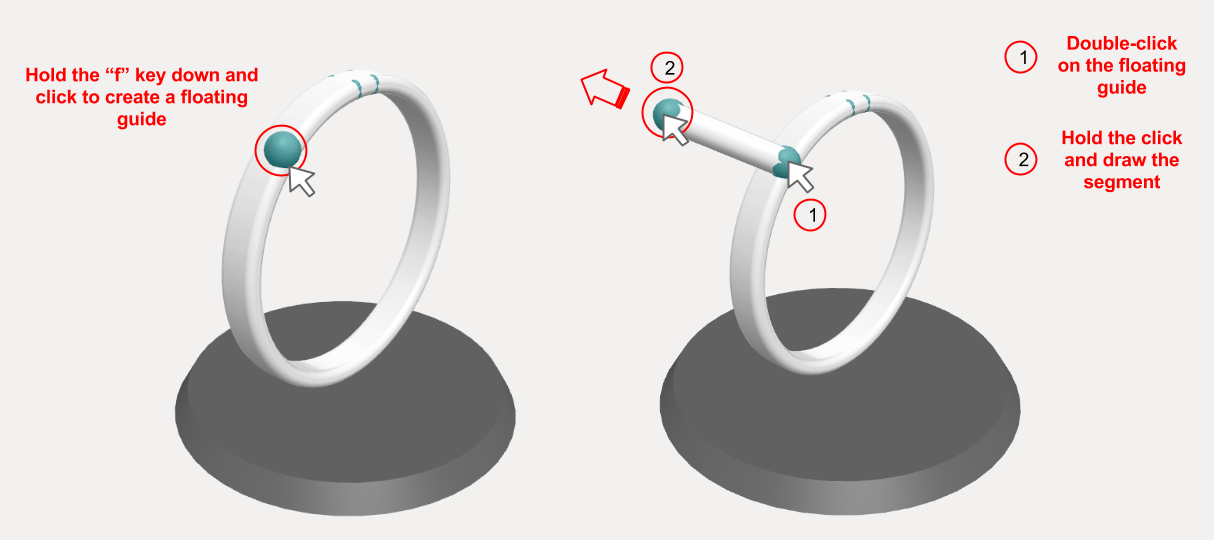
Vous pouvez aussi créer des segments à partir de guide "flottants". Pour ajouter un guide flottant, maintenez la touche f enfoncée et cliquez sur un élément existant (guide, anneau, segment). Relâchez ensuite la touche f et créez un segment à partir de ce guide flottant, comme précédemment.
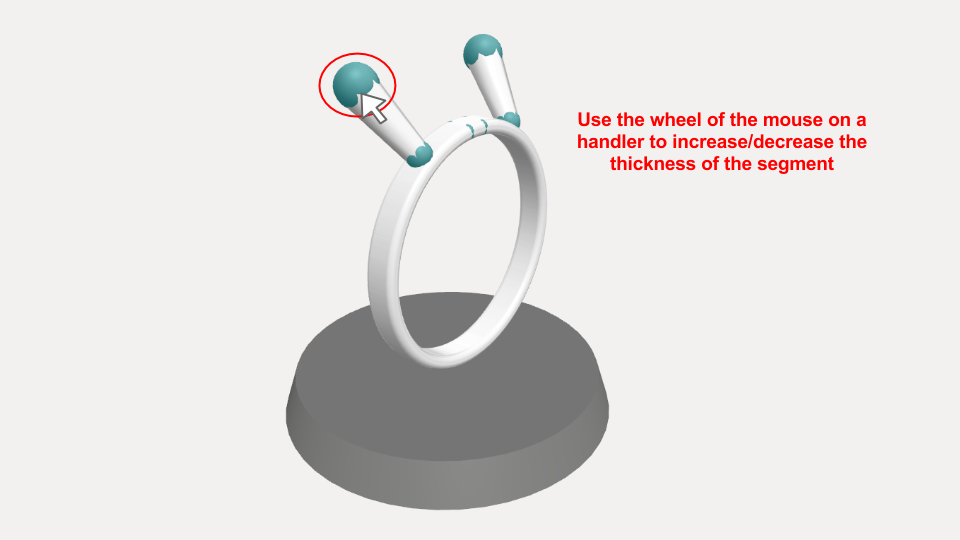
Use the mouse wheel to increase/decrease the segment thickness.
To double-click on the segment enable to subdivide it and to \"break\" it.
To delete a handler will delete all the segments that depend on it. Hold the key d down and click on the handler to delete.
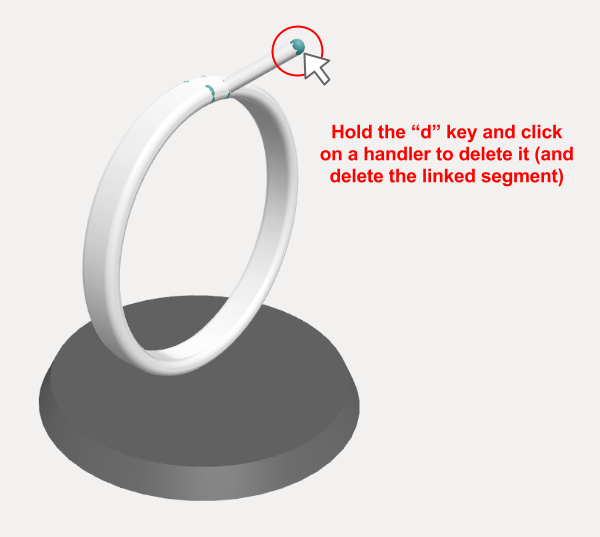
NB: A handler left alone will look like a ball on your object.

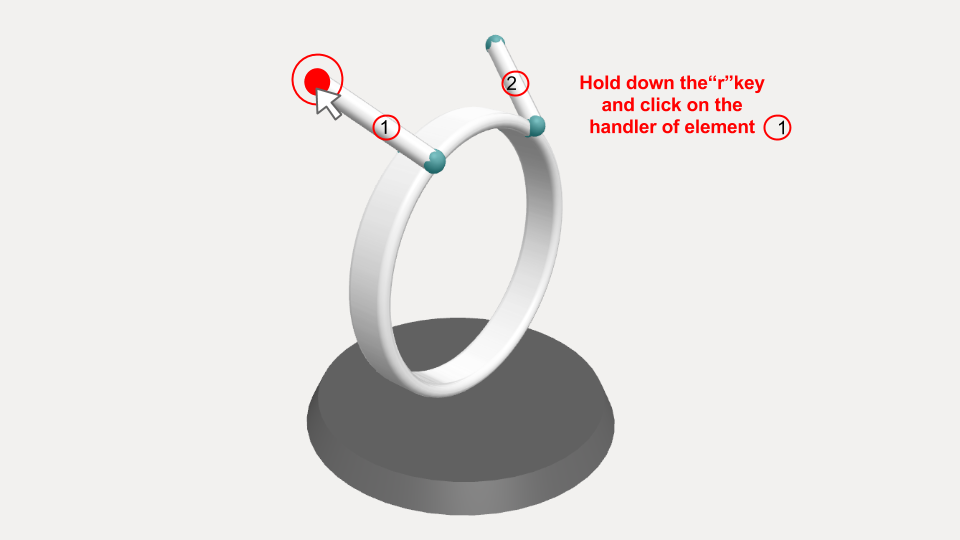
The key r enables you to merge two handlers in one single element. Hold the key r down and click on the first element's handler.
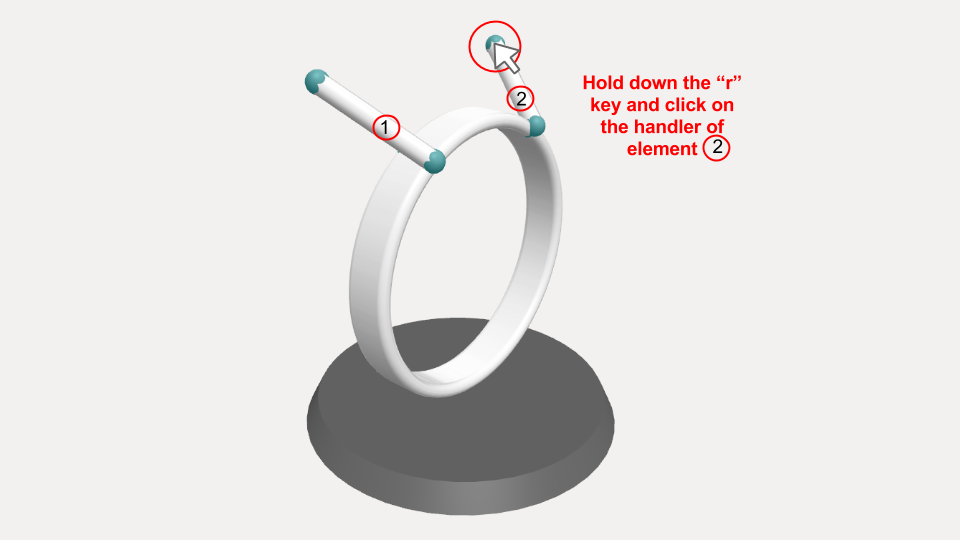
Click on the handler of the element 2.
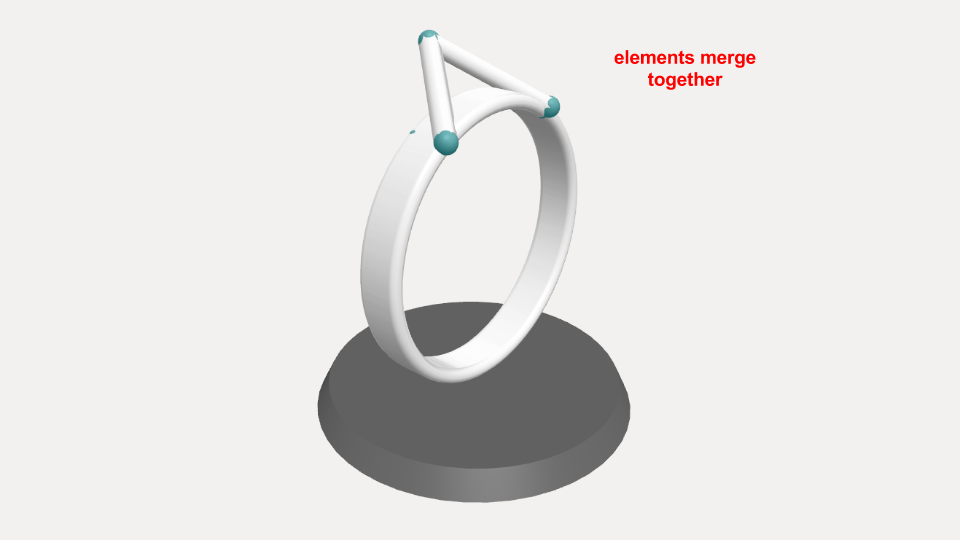
Both handlers merge.
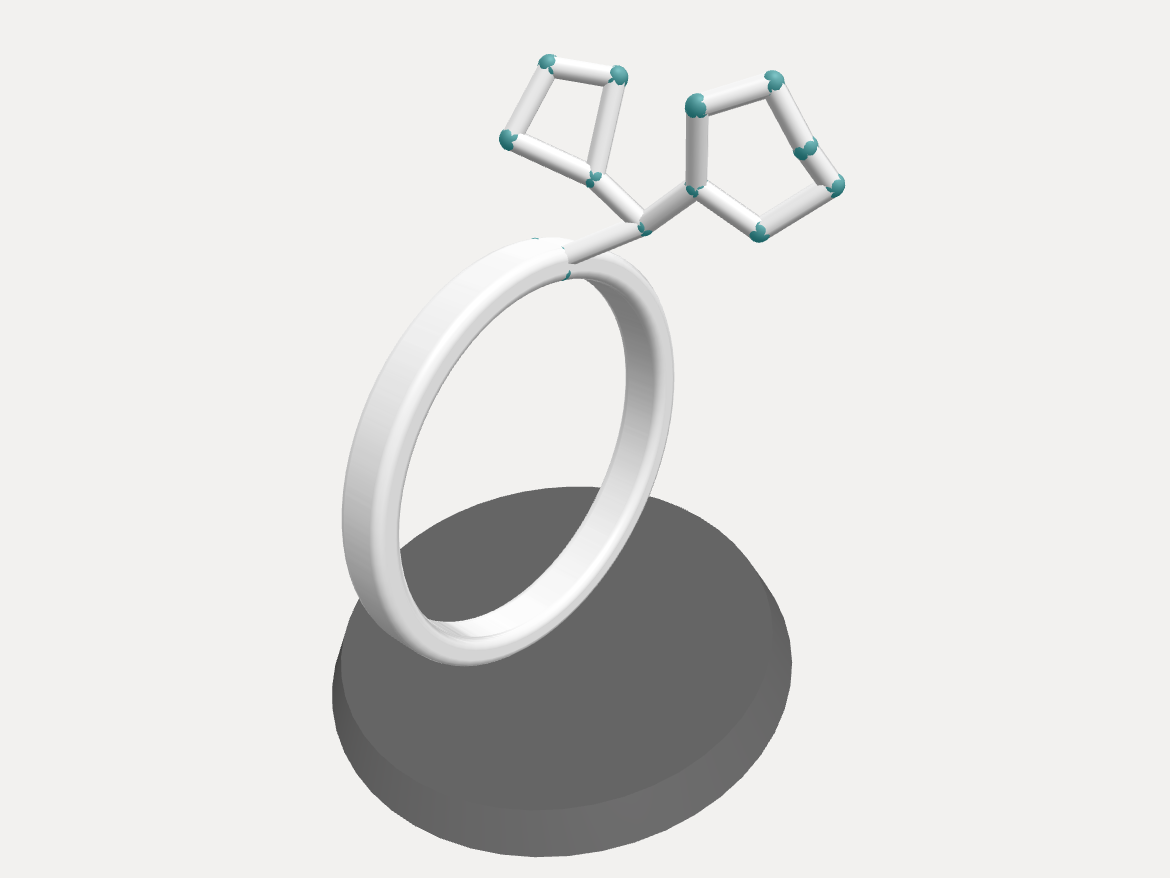
The key a enables you to move or turn sets of elements. This mode has two steps:
- Select an anchor
- Actions on sets of elements.
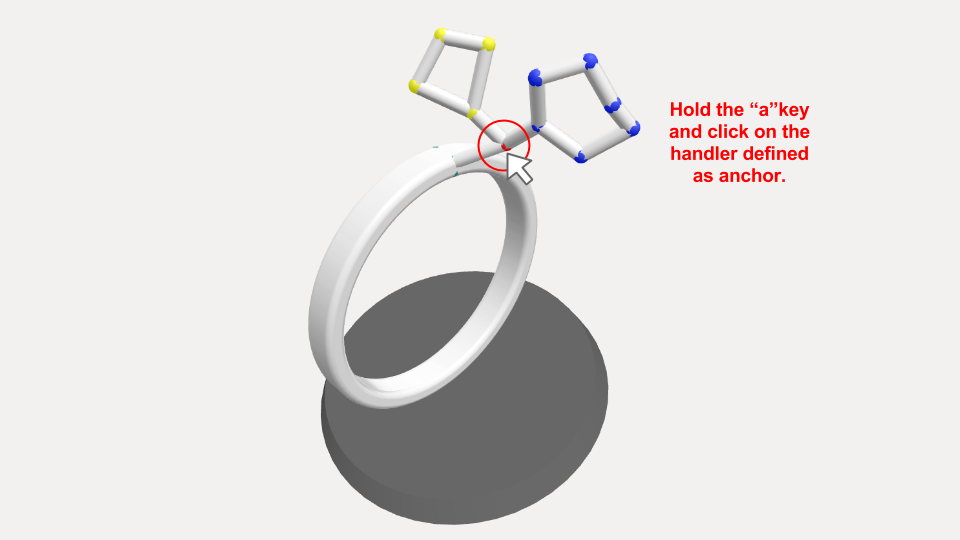
Hold the key a down and click on the handler you want to define as the anchor. The anchor will always remain fixed and enables to visually define which sets can be articulated around this anchor. Sets with the same color belong to the same group.
- Select an anchor
- Actions on sets of elements.
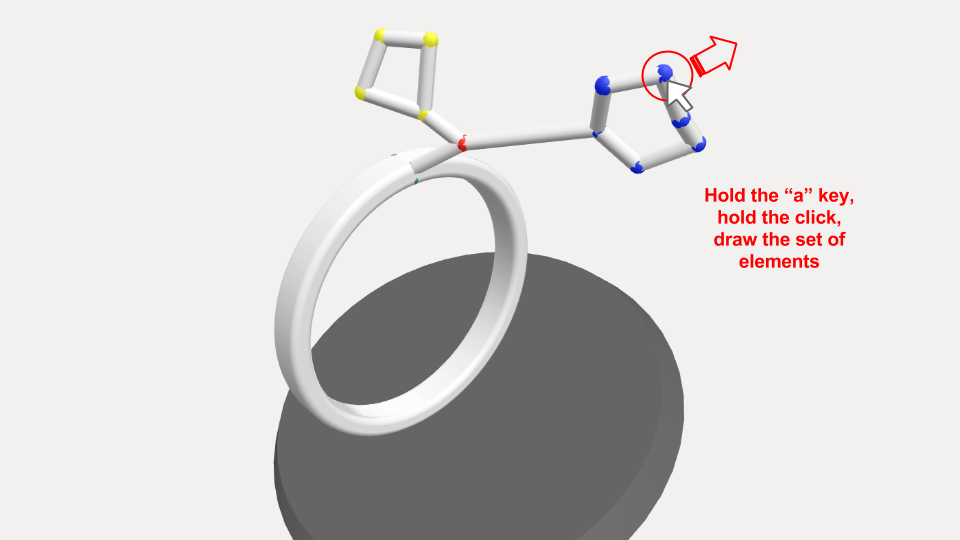
To move a set of elements, hold down the key a, click on a handler and move it.
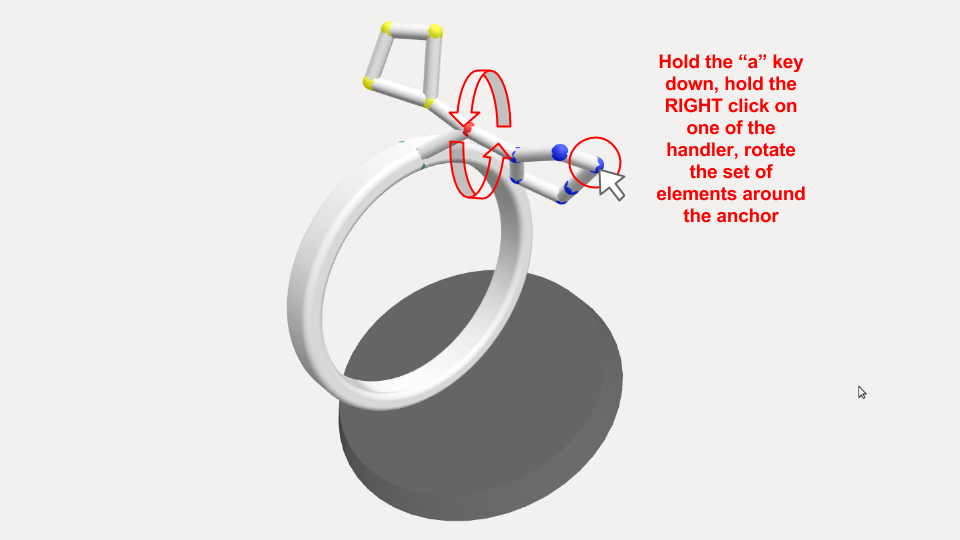
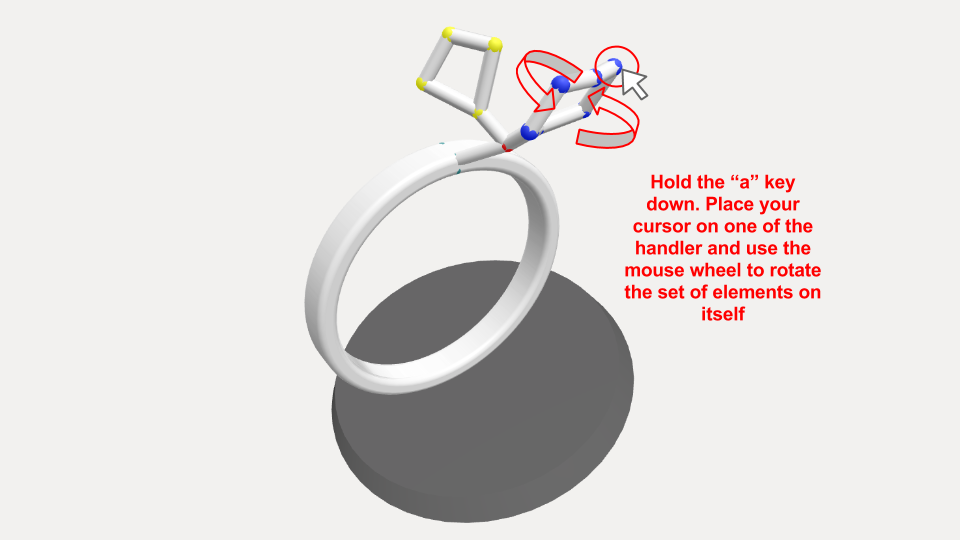
Click right on one of the handler of the colored group that you want to rotate around the anchor holding down the key a.
Place your cursor on one of the handler of the colored group and use the mouse wheel to rotate the set on itself.
In practice
Let's put our knowledge in practice to create a ring.
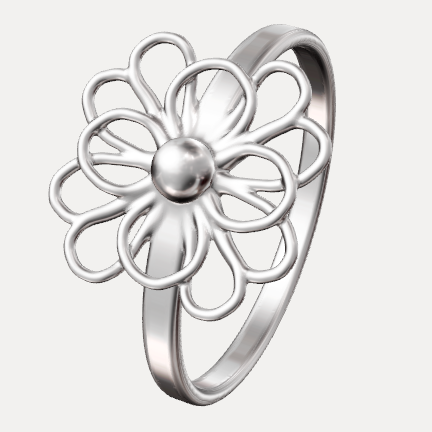
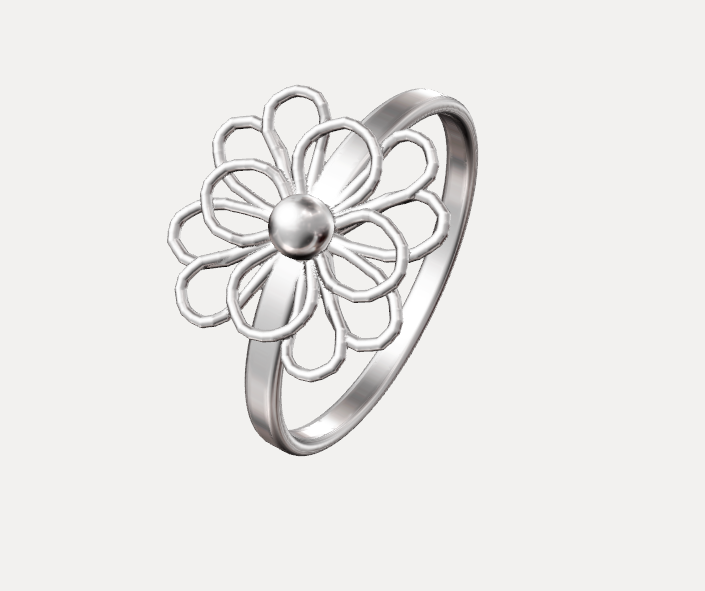
Flower ring
The flower ring use all the actions available in the tool. It is an excellent practice that will enable you to feel at ease with all your future creations.
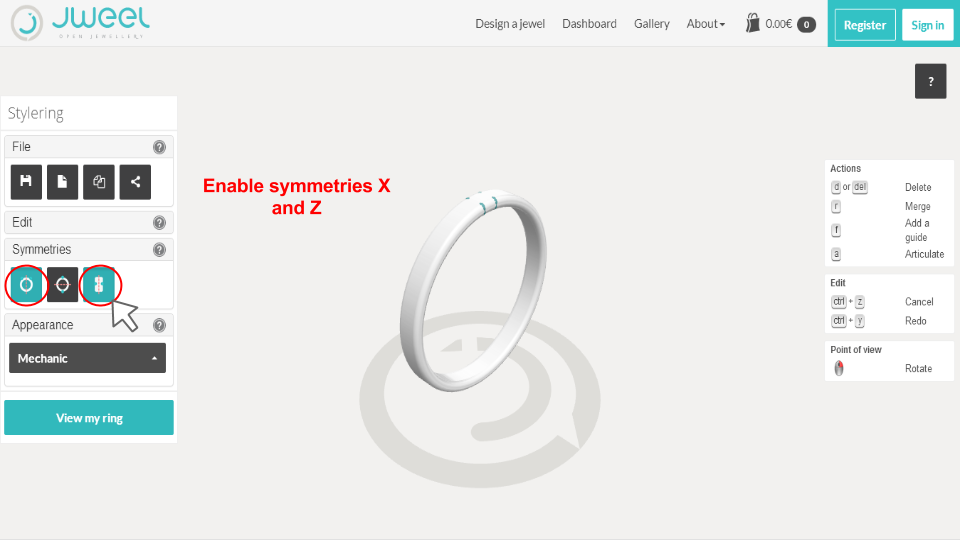
Enable X and Z symmetries. That will allow you to work on one side of the ring only and see all your actions be repeated on the other side.
Double-click on the ring to add two new handlers.
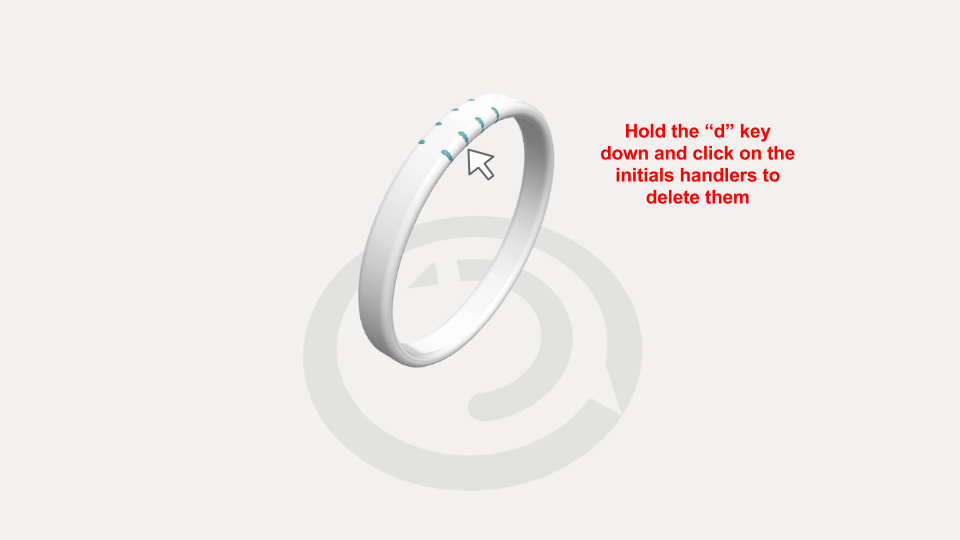
Hold down the \"d\" key and click on the two inital handlers to delete them. Indeed, the selected symmetries only concerns the new handlers.
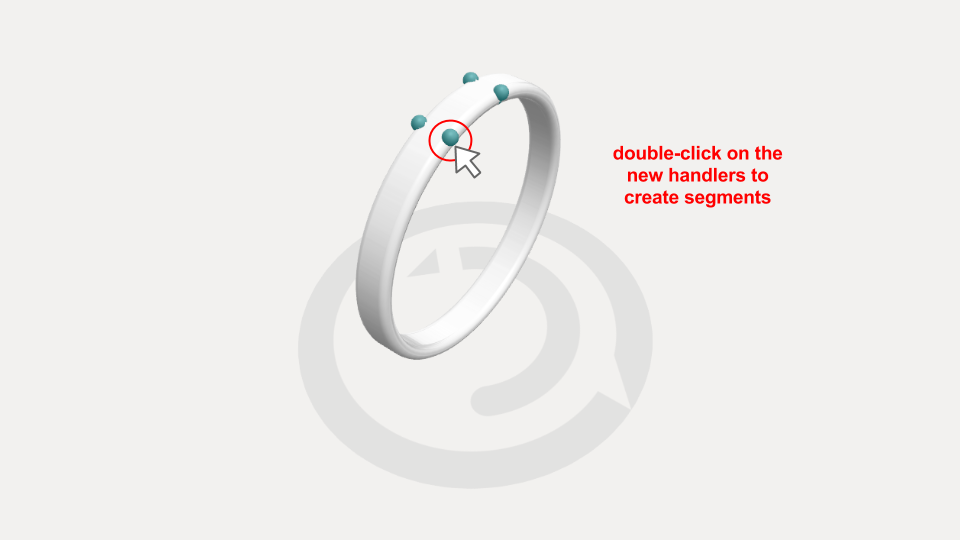
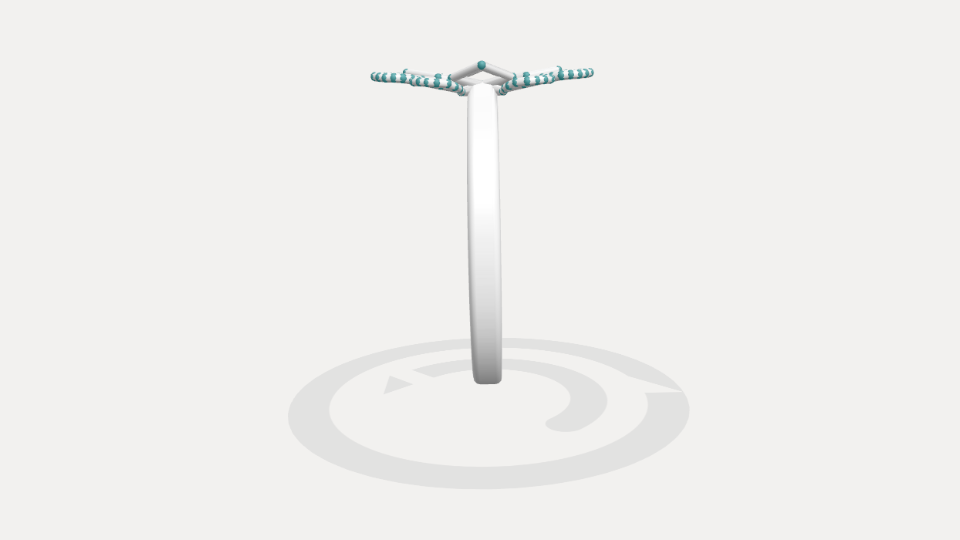
Double-click on the new handlers to create segments. Now, symmetries concern all the elements you are going to create.
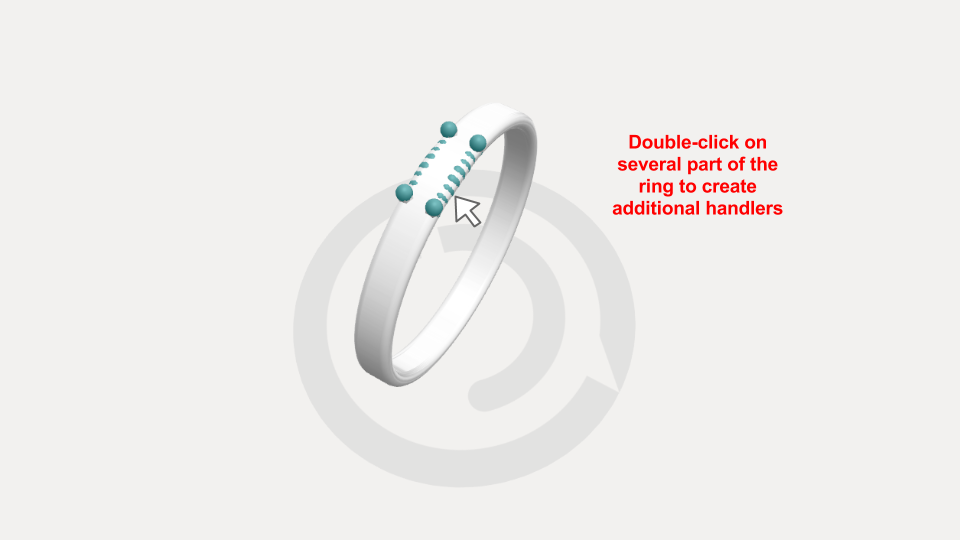
Double-click several times on the ring to create new handlers (try to stay centered as possible)
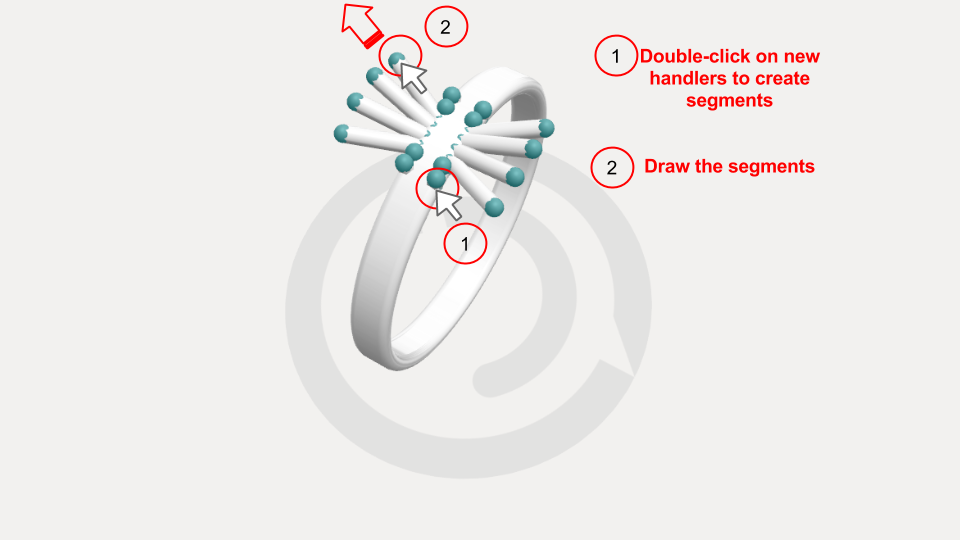
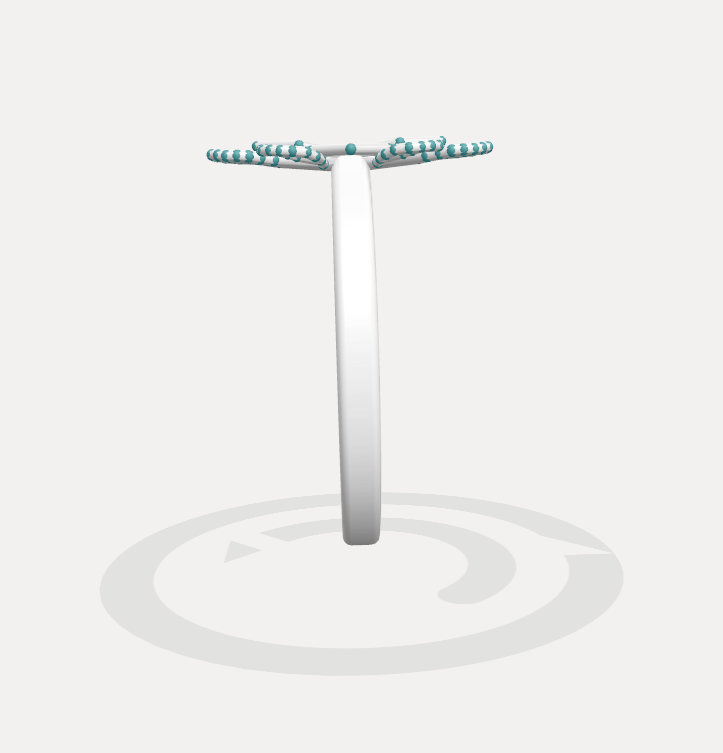
Double-click on the new handlers to create segments, then draw them.
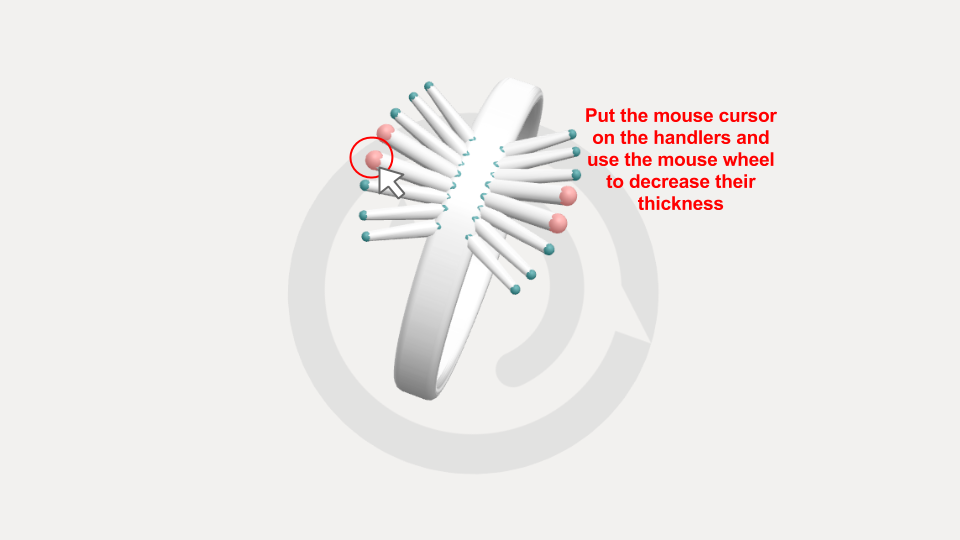
Put your mouse cursor on the handlers and use the mouse wheel to decrease the thinckness of the segments.
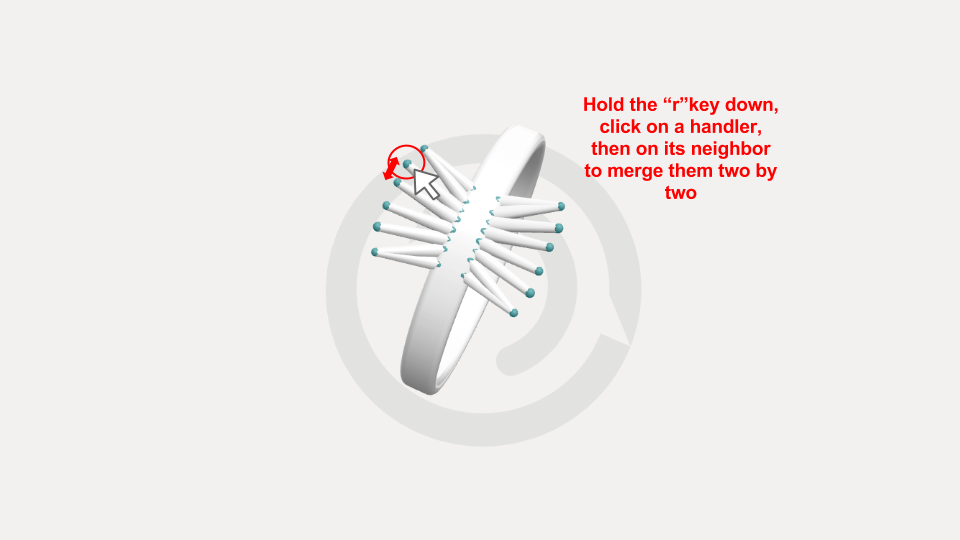
Hold the \"r\" key down and click on a handler, then click on its neighbour to merge them toghether. NB: release the key after every merge of couple to avoid the merge of all handlers.
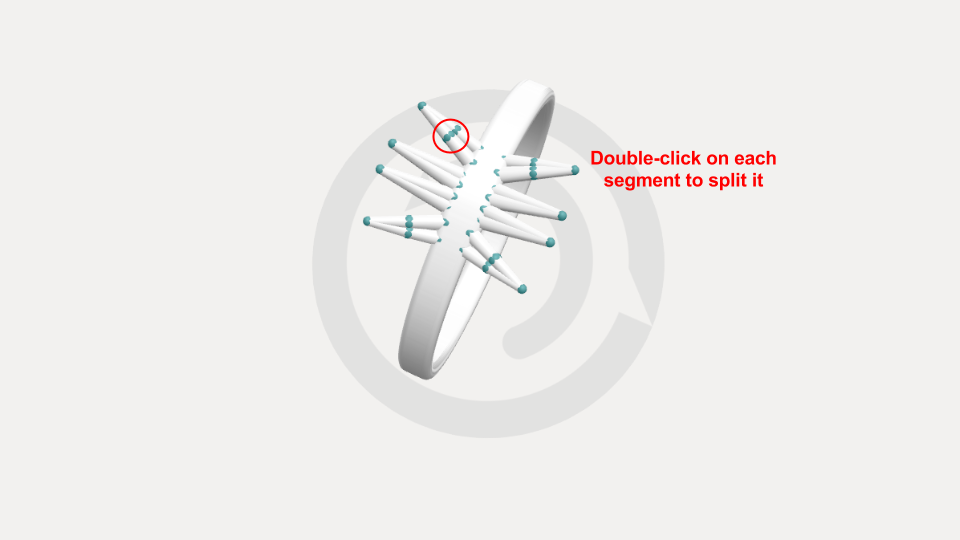
Double-click on the segment to subdivide it.
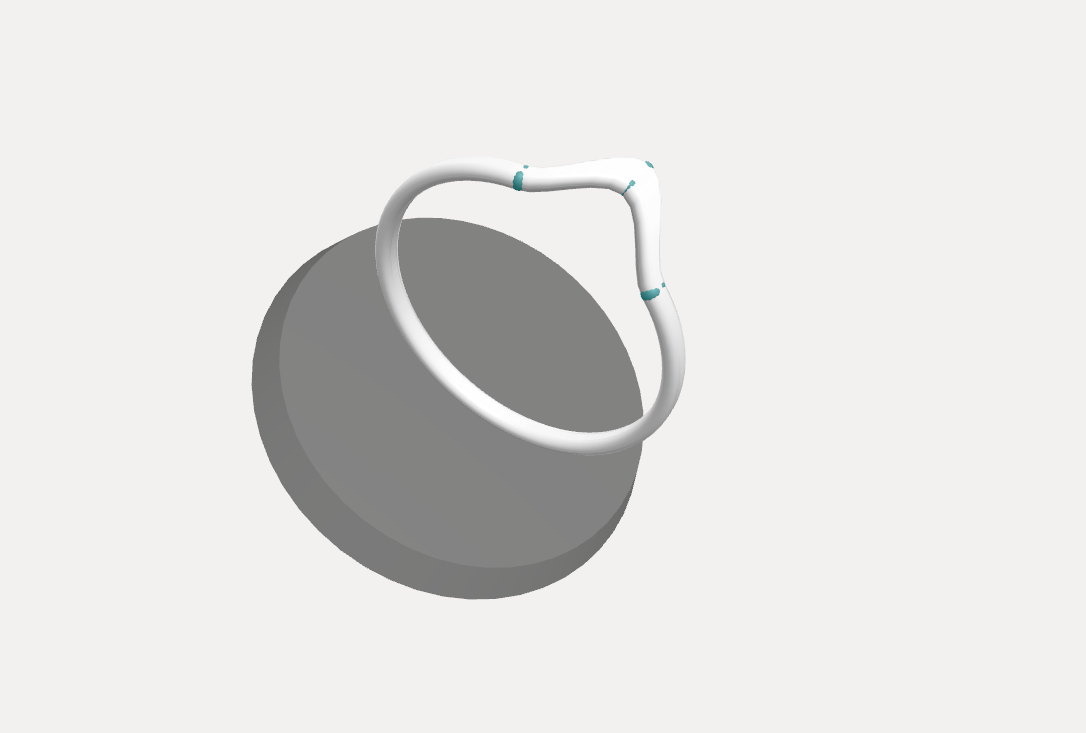
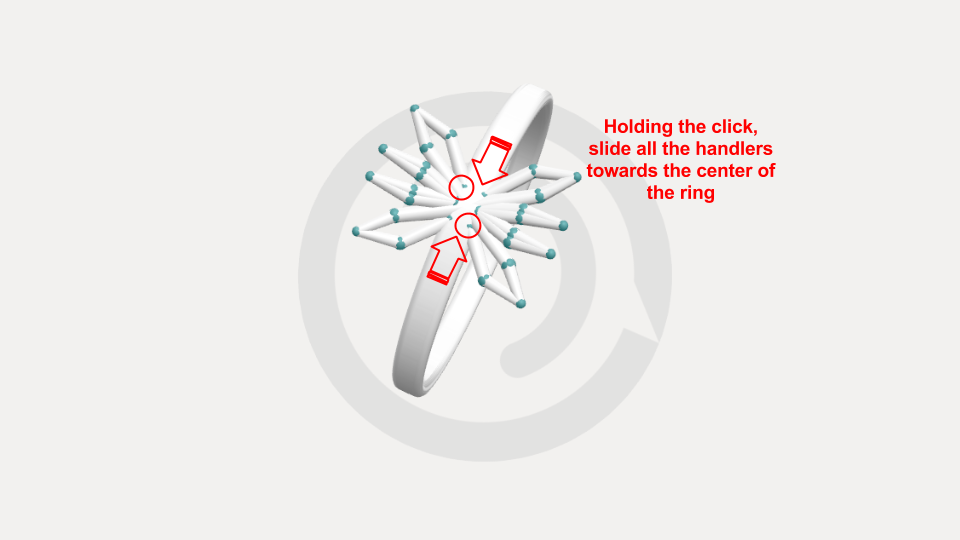
Hold the click down and silde all handlers toward the center of the ring.
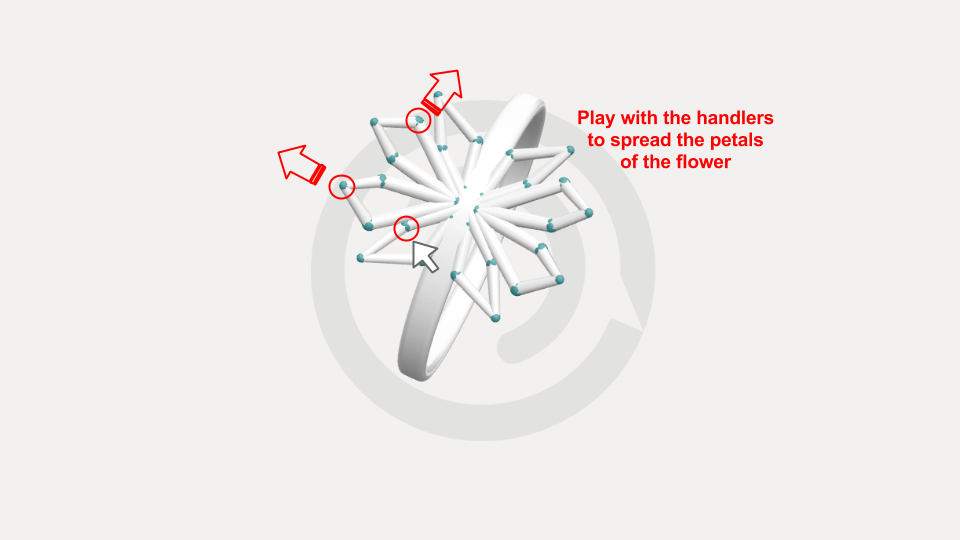
Play with the handlers to spread the petals of the flower.
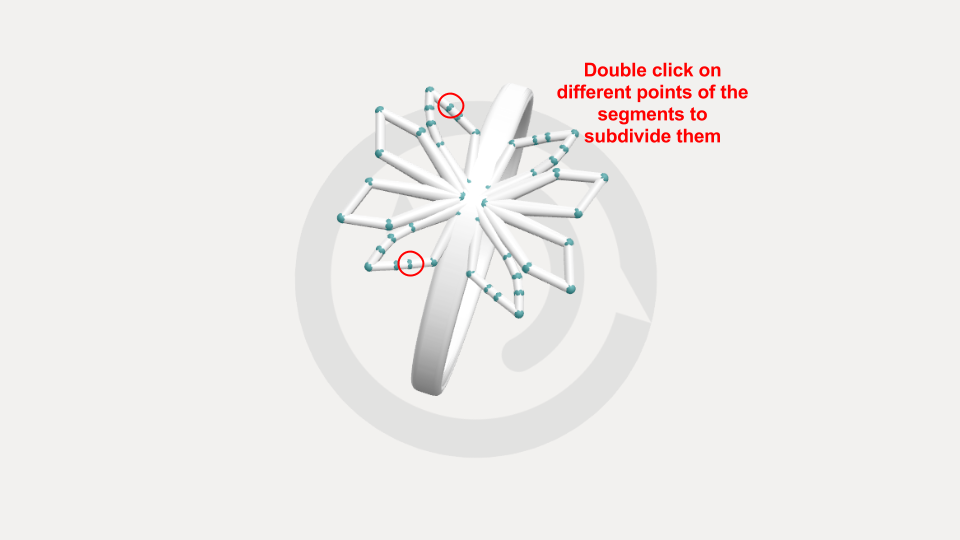
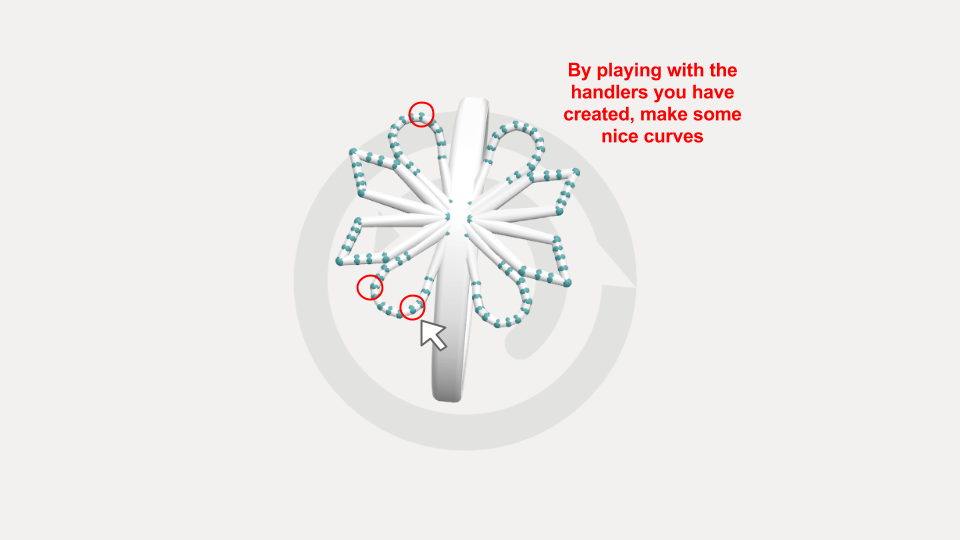
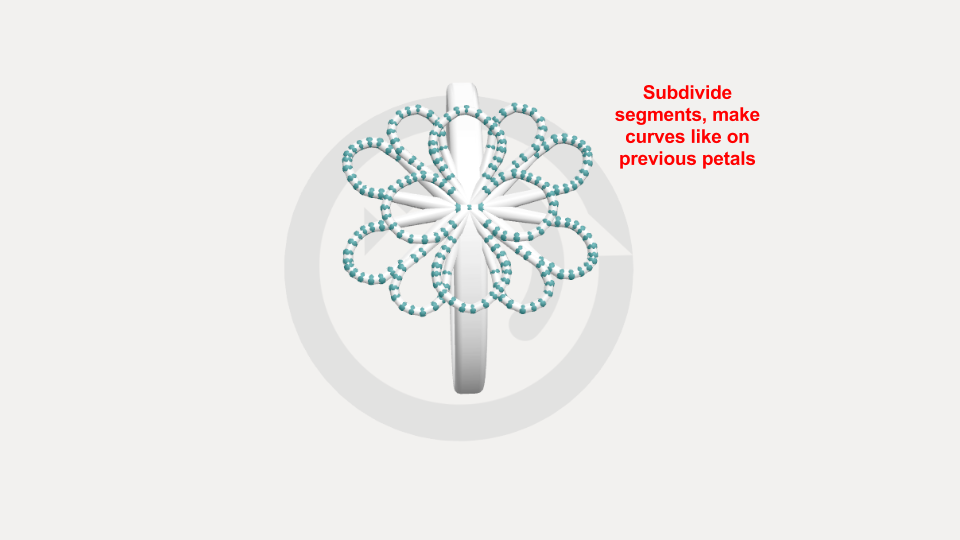
Sudivise the segments at different points. This action aims to create curves on the petals.
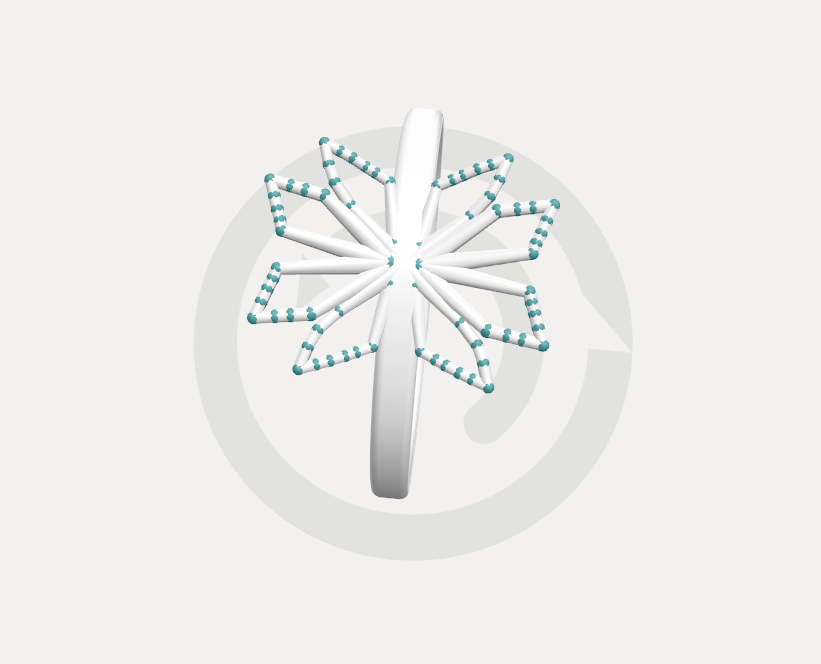
Play with the different handlers you have just created in order to realize nice curves. Do not hesitate to add several handlers by subdividing your segment. The more numerous the handlers will be, the more regular the curve. You can also chose not to curve you petals and to let them a more geometrical aspect.
Double-click on the ring to add a two new segments.
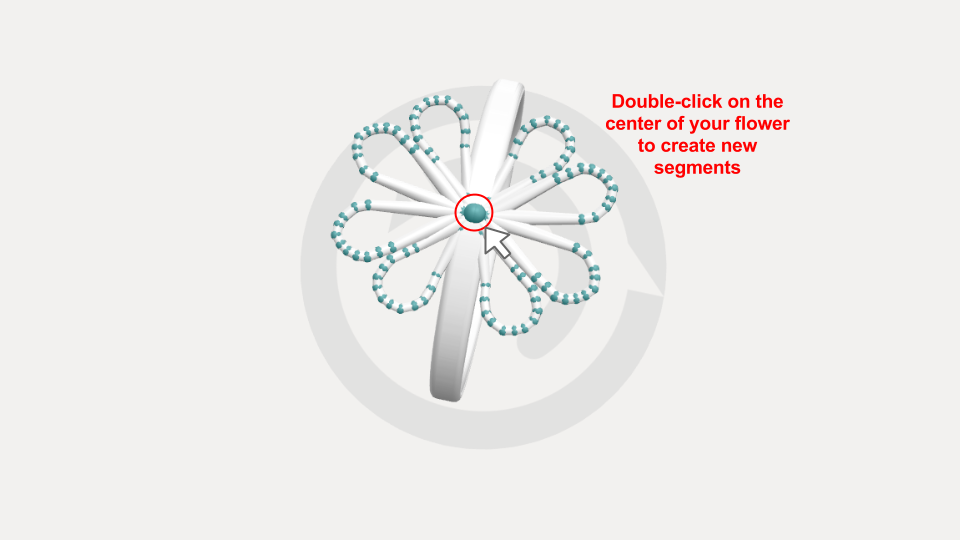
Draw the segments and double-click again in order to reproduce the action.

Draw the segments and, just like before, subdivide them.
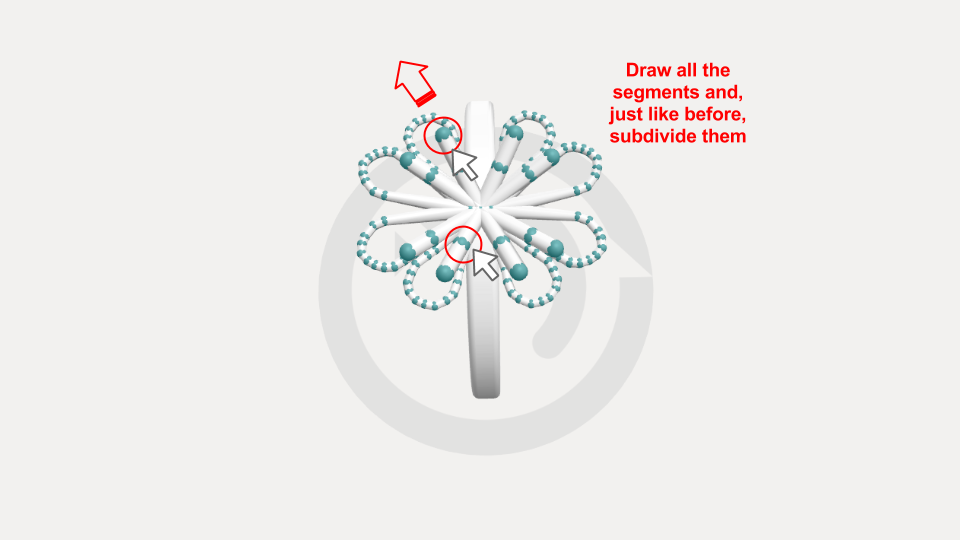
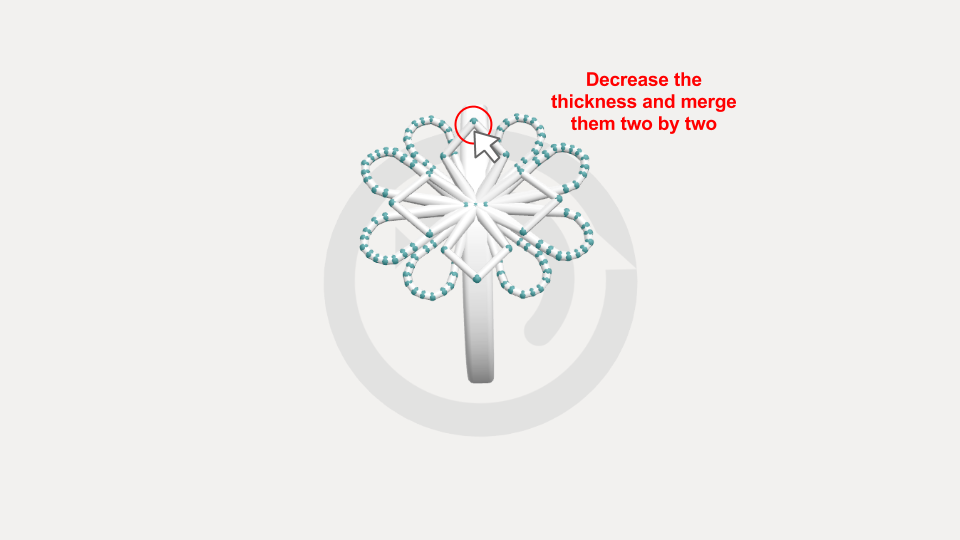
Decrease their thickness and merge them two by two to create four new petals.
At this stage, change your angle by rotating the camera (right click of the mouse). 3D modelling includes to take into account every views of your object. It's not unusual to see a discrepancy by changing the camera angle. Here, for example, it would be interesting to pull down some of the petals to get a better harmony.

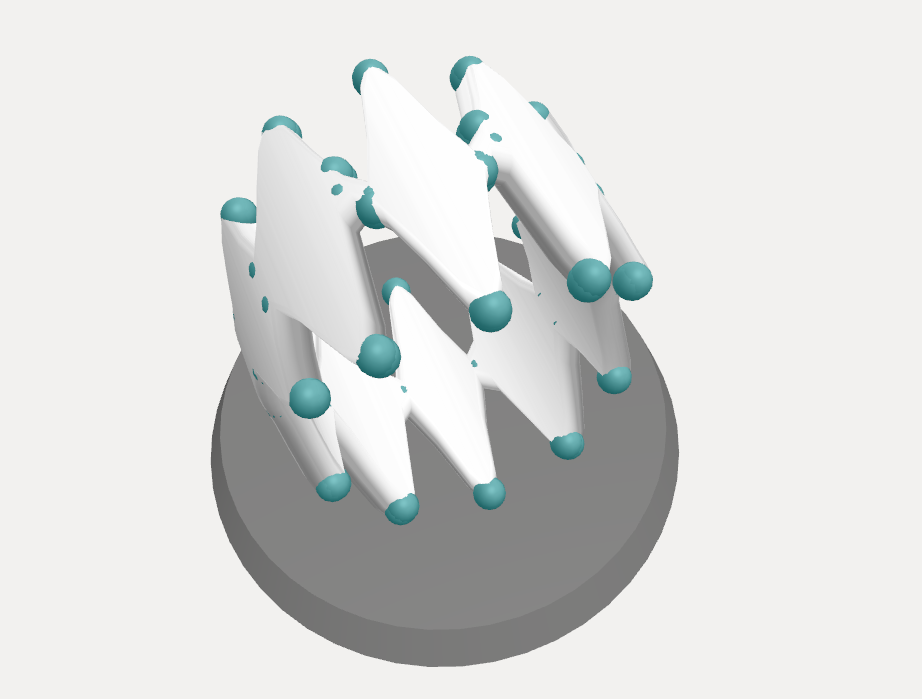
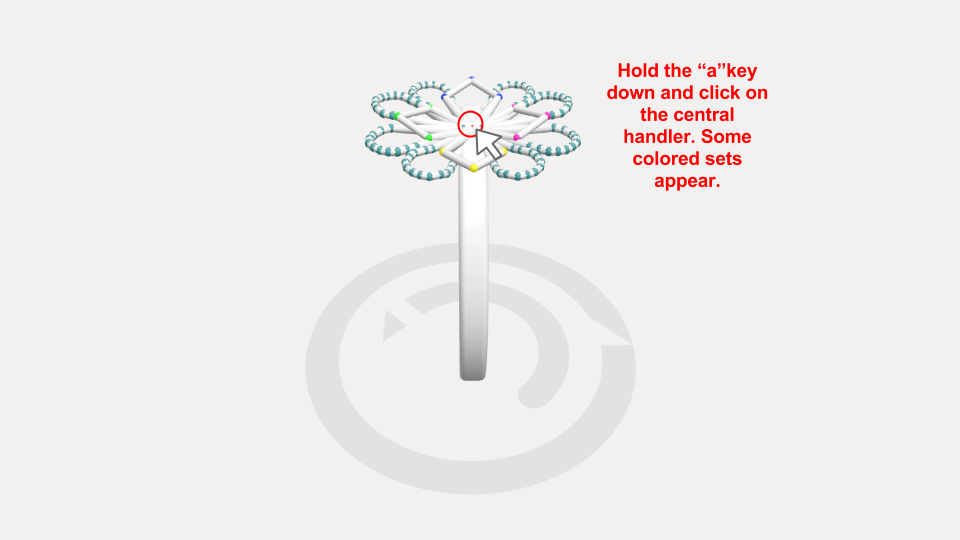
To move some sets of elements, use the \"articulate\" mode. Hold the akey down and click on the handler in the center of the ring. Some sets of different colors appear.
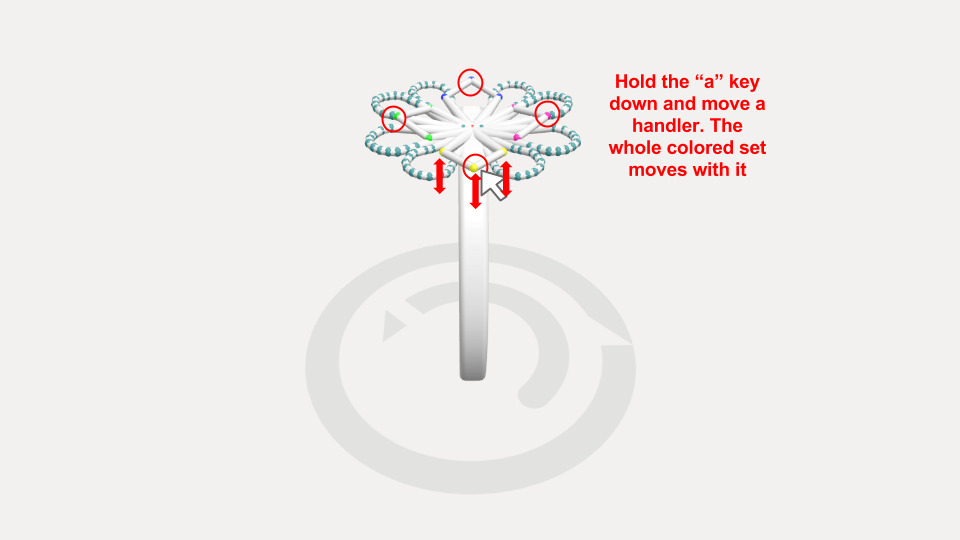
While holding the key a down, move a handler. The hadler moves every set of elements that are linked with it.
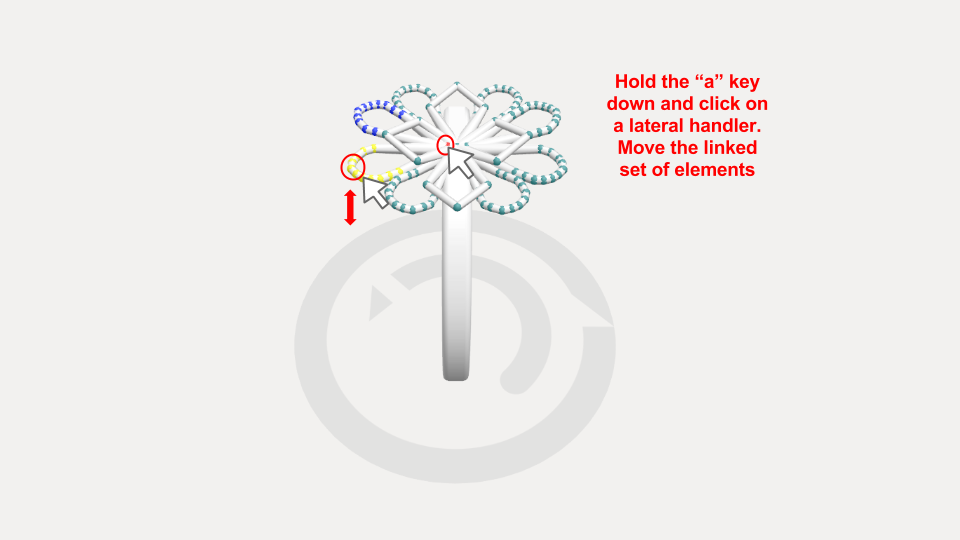
Same action for lateral petals. Whils holding the a down, click on one of the lateral handler and move the set of elements.
Your flower has now to form a right angle with the ring.
Like the previous petals, subdivide the segment to create curves.
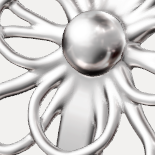
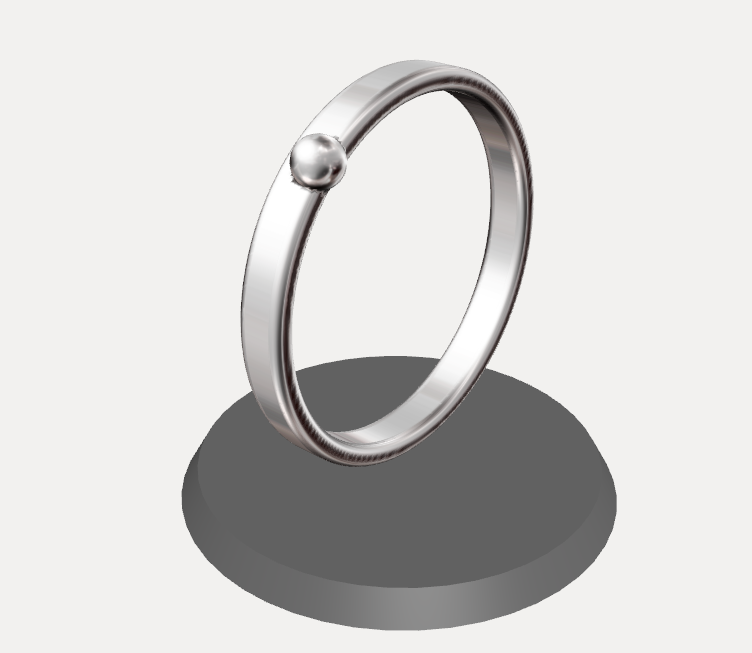
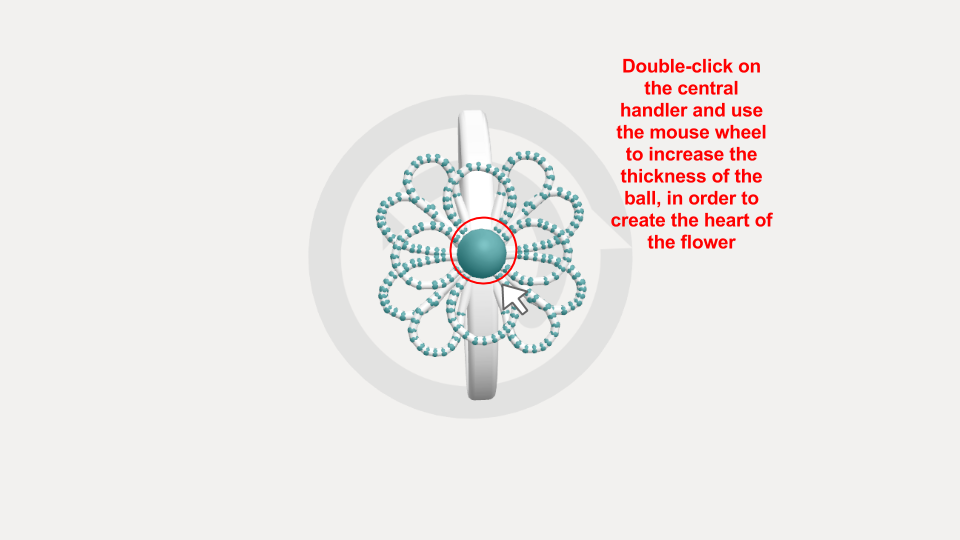
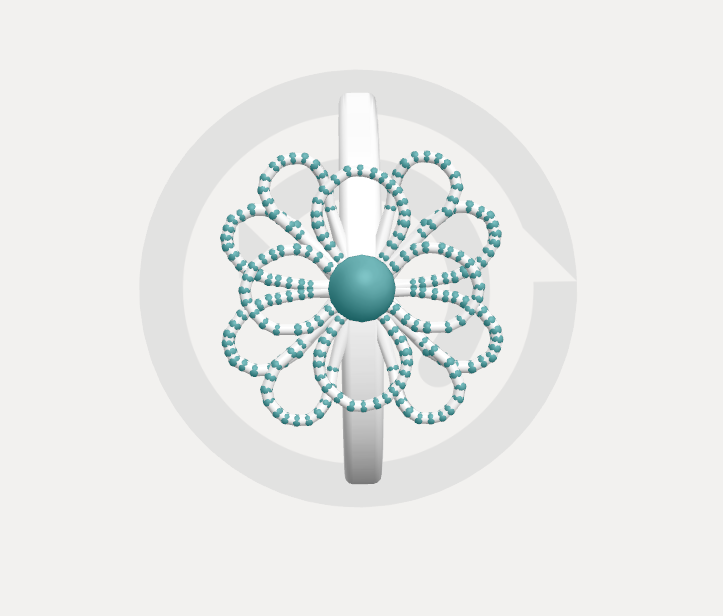
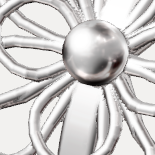
Double-click on the central handler, use the mouse wheel to increase the thickness of the ball, which will form the heart of your flower.
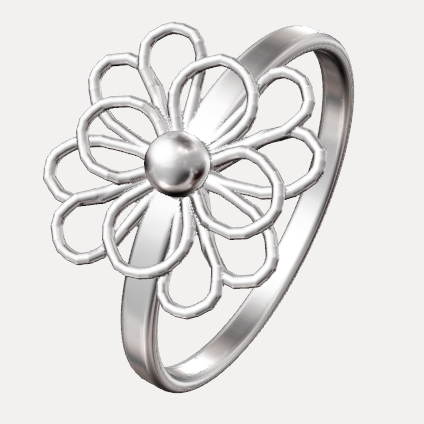
Congratualtions, your flower ring is done! Now view it!

Thanks to the realistic view, do not hesitate to make some adjustments by clicking on \"back to the model\" button.

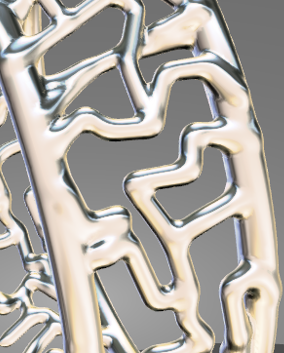
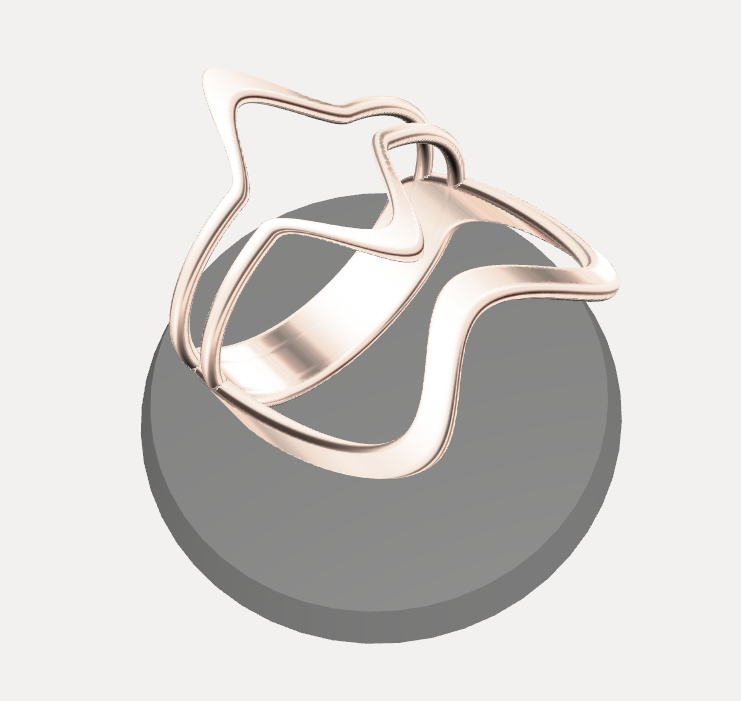
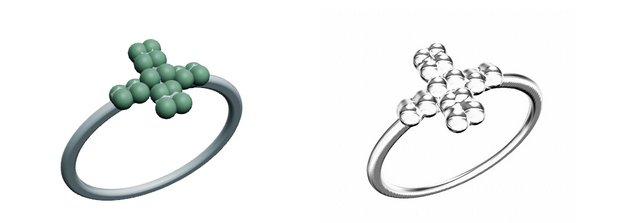
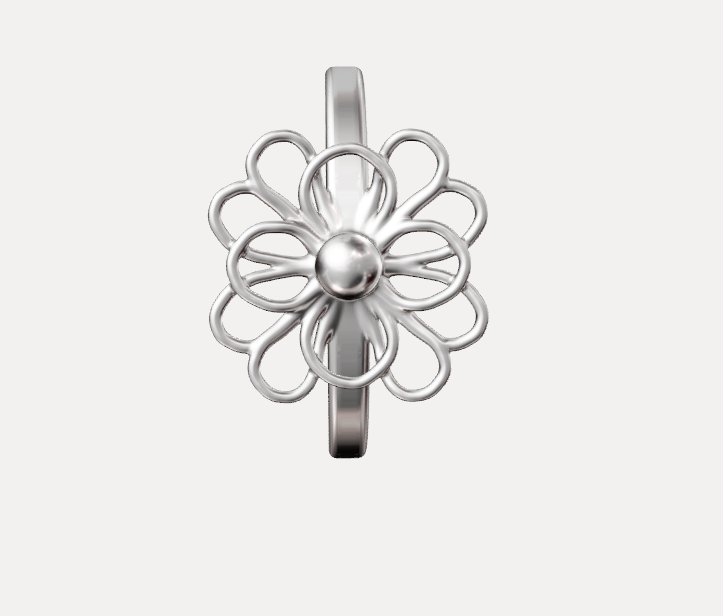
Choose a \"mechanic\" or \"organic\" rendering. The appearence of your piece of jewelry will look different.
Mechanic
Organic