Tutorial: Embossed Rings
Welcome to our application to create embossed rings! This tool enables you to fully customize a classic ring by engraving or embossing 2D designs on it.
The general principle is simple: your ring is represented by a grey band on which you can import images of your choice. White elements will be embossed (+0.5mm) on the ring and symmetrically black elements will be engraved (-0.5mm).
The ring itself is also completely customizable through the small interface controlling the sectional view.
1. Tool overview
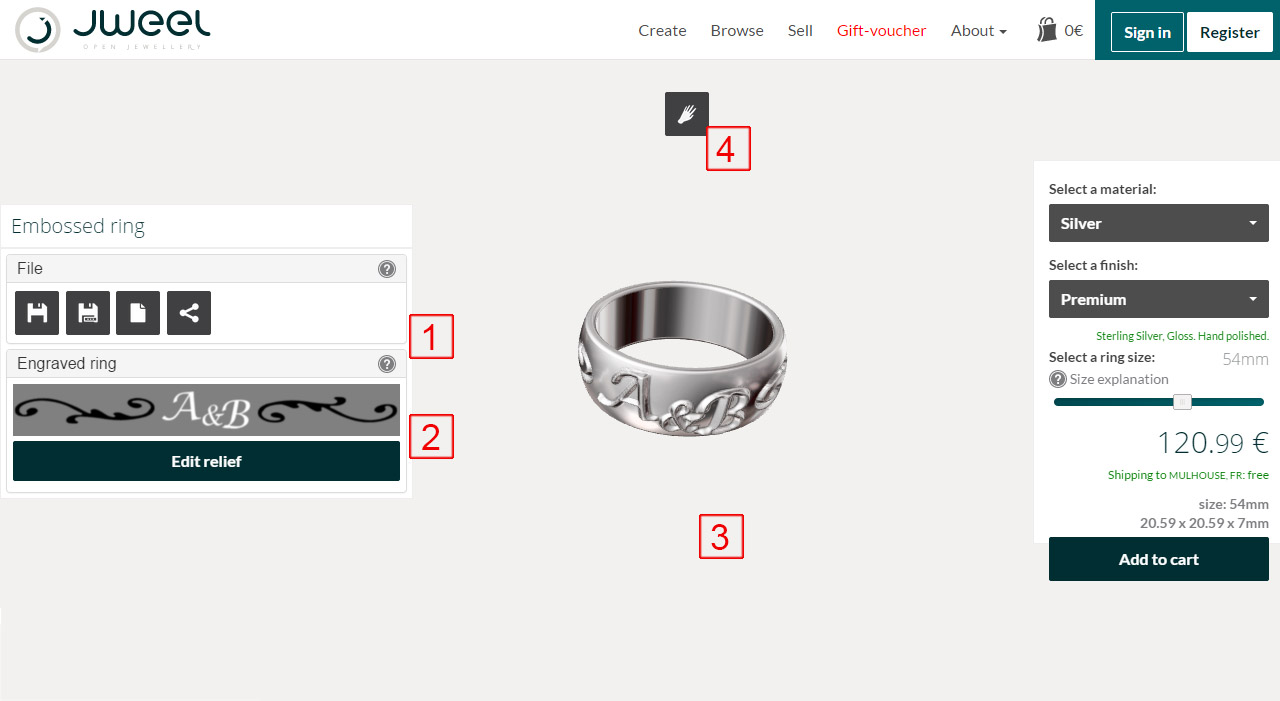
General overview of the initial application
 |
File Menu | The file menu enables you to save your work or to manage publish settings. |
 |
Embossed pattern preview | This menu allows you to see which embossed pattern is currently applied on your ring. The Edit button launches the interface to edit your object. |
 |
3D view | Once generated, your ring will appear in 3D on your screen. |
 |
3D Hand | The top hand button enables you to preview the appearance of your ring on a virtual hand. |
General overview of the pattern control interface (Edit button)
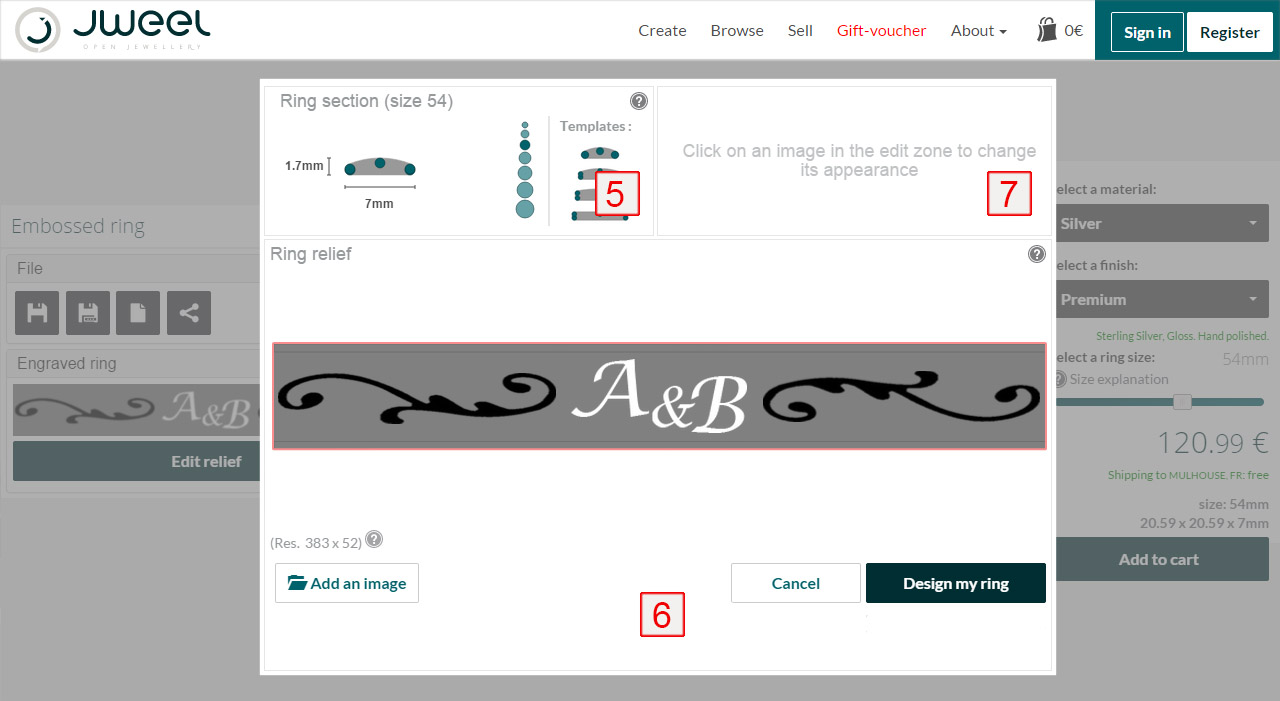
 |
Sectional view | This box allows you to decide the shape and dimensions of your ring with a cross-sectional view. More details in section Ring section. |
 |
Edit zone | The pattern that will be embossed/engraved on your ring is shown here, you can move the elements using your mouse and import new images. More details in the section Embossed pattern on the ring |
 |
Selection | Displays information about the selected element, as well as a few controls to edit it. |
2. Ring section
Global shape
With this view, you can choose the width of your ring, the rounding of the corners and how it will be domed on top.
Warning : dimensions shown are valid for a ring size 54. If you order a ring in a different size, dimensions will be adapted to maintain the right proportions of the embossed pattern.
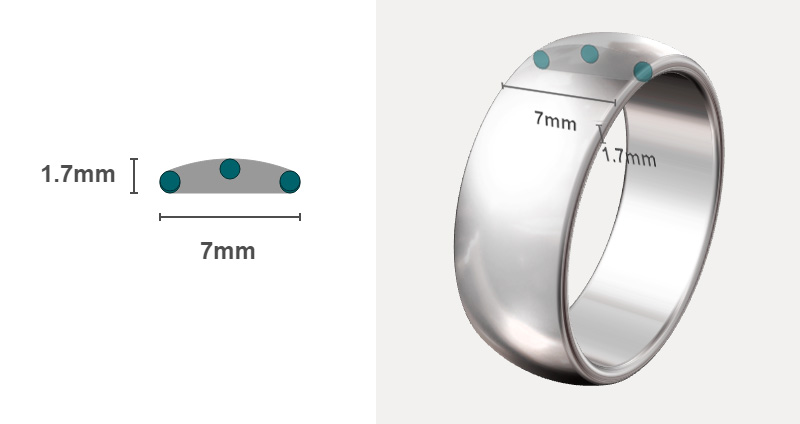
To change the shape of your ring, click on the green circles and move them to your likings.
Angles
You can also change the size of the circles by clicking the scale on the right. This will change the appearance of your ring edges: very angular, or very rounded.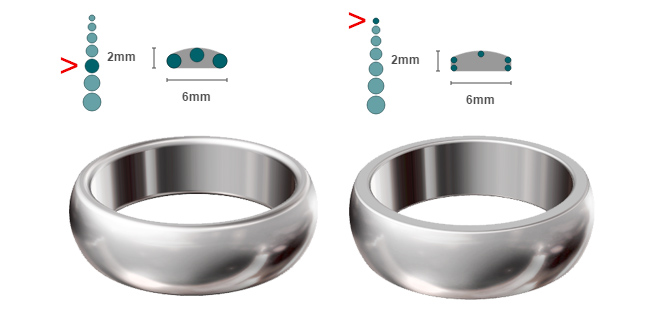
Note importante : La forme de l’anneau influence les proportions du relief qu’on peut y incruster. Par conséquent, la hauteur de la bande du panneau Relief de l’anneau change en fonction des changements que vous apportez à la coupe.
3. Embossed pattern on the ring
On this panel, you'll find everything you need to create a unique embossed design in few clicks. When finished, click on the bottom right button to generate the 3D ring.
Ring band
The grey band represents the top of your ring, ie the place on which the design will be embossed or engraved.
La couleur neutre est un gris à 50%, il indique que cette partie de l’anneau ne sera ni surélevée, ni creusée. (Gris à 50% : RBG(128,128,128) ; #808080)
The grey level determines the appearence of ring surface: the more the color tends to black, the more the pattern is engraved (black = 0.5mm engravement ). The more it tends to white, the more the pattern is embossed (white = 0.5mm emboss).
Adding and editing an image
To add images to the band, use the bottom left button.
Once the image is imported, you can select it by clicking on it and then move and edit it using manipulators that appear.

To remove a selected image, click on the red cross on the top or press the Delete key.
Technical details
The maximum resolution you can embross on your ring is half the one shown above the import image button. The image of the band you see on the screen is so reduced to match the resolution.If you design your ring on an image processing software, keep in mind that reference resolution. The details below 2 pixels may not highlight correctly after manufacturing, especially on highly polished materials such as silver.
The 3D model gives a good idea of the result, except that it does not take into account the polishing or plating processes (premium Silver, Gold).
4. Selection
When you select an image, the selection menu offers options to edit it.Relief amplitude
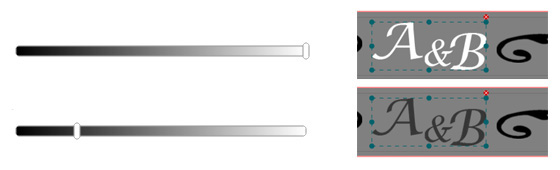
This interface allows you to change the color (and therefore the embossing/engraving) of the selected image. If it is monochrome, one slider appears, otherwise two sliders surround the range of grey shades found in the image.